New TopRC T-28 Trojan
 04-04-2024, 02:44 PM
#276

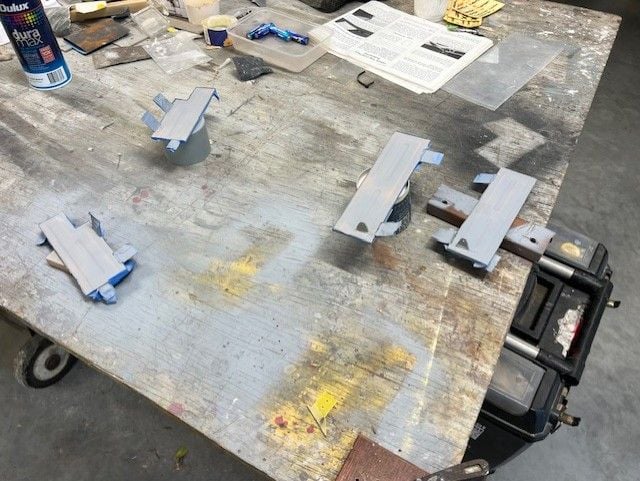
Plugging away, decided to tackle a bit of the painting of gear doors, wheels etc with matt white. Still the inner doors and wheels to finish off.
Legs also to be done once I have adjusted the long leg door linkages, that way I can lock the link collar in place prior to painting.
Legs also to be done once I have adjusted the long leg door linkages, that way I can lock the link collar in place prior to painting.

The following users liked this post:
totka (04-05-2024)
04-05-2024, 11:49 AM
#277
 04-05-2024, 12:24 PM
#278


I have not started it yet. I have a Mamba 120 coming in to assemble with a 150 Radial first and then I will hopefully get on the T-28. I wonder if my Moki 150 would be enough power to fly the T-28 for anything other then basic flight?
No worries. Hopefully you got the information on the prop setup that Peter and I have. Talk soon.
The following users liked this post:
totka (04-05-2024)
04-05-2024, 02:27 PM
#279
[QUOTE=JRSmith;12797952]I have not started it yet. I have a Mamba 120 coming in to assemble with a 150 Radial first and then I will hopefully get on the T-28. I wonder if my Moki 150 would be enough power to fly the T-28 for anything other then basic flight?
I would say more than enough power. I saw the UMS 180 pull around a bit stearman bipe a few weeks back and that engine has some grunt. 180 will be overpowered and 150 should be very nice. I'm advised the Miki has less collector ring clearance issues than the UMS as well.
Short video of retract with gear doors on, only the one side so far. Very fiddly to get right.
The following users liked this post:
totka (04-05-2024)
04-05-2024, 03:09 PM
#280
[QUOTE=planenutzz;12797973]
Thanks Peter,
That is good information. The Moki with the internal collector should allow for much better clearance. I just need it to fly scale and do basic loops and rolls! I am putting a UMS 150 in the Mamba 120, since it fits perfectly! So good to know that I already have a motor for the T-28 and don't need to out and go buy a Moki 180 for it. Talk soon and great video, looking good!
Jason
I have not started it yet. I have a Mamba 120 coming in to assemble with a 150 Radial first and then I will hopefully get on the T-28. I wonder if my Moki 150 would be enough power to fly the T-28 for anything other then basic flight?
I would say more than enough power. I saw the UMS 180 pull around a bit stearman bipe a few weeks back and that engine has some grunt. 180 will be overpowered and 150 should be very nice. I'm advised the Miki has less collector ring clearance issues than the UMS as well.
I would say more than enough power. I saw the UMS 180 pull around a bit stearman bipe a few weeks back and that engine has some grunt. 180 will be overpowered and 150 should be very nice. I'm advised the Miki has less collector ring clearance issues than the UMS as well.
That is good information. The Moki with the internal collector should allow for much better clearance. I just need it to fly scale and do basic loops and rolls! I am putting a UMS 150 in the Mamba 120, since it fits perfectly! So good to know that I already have a motor for the T-28 and don't need to out and go buy a Moki 180 for it. Talk soon and great video, looking good!
Jason
04-06-2024, 03:52 AM
#281
Hi Jungs
Today I also received a model, it was brought to me straight to the airport😁 I'm really looking forward to the construction. Have a nice weekend to you
Regards, Gabor from Hungary
Today I also received a model, it was brought to me straight to the airport😁 I'm really looking forward to the construction. Have a nice weekend to you
Regards, Gabor from Hungary
The following users liked this post:
totka (04-07-2024)
04-06-2024, 02:32 PM
#283
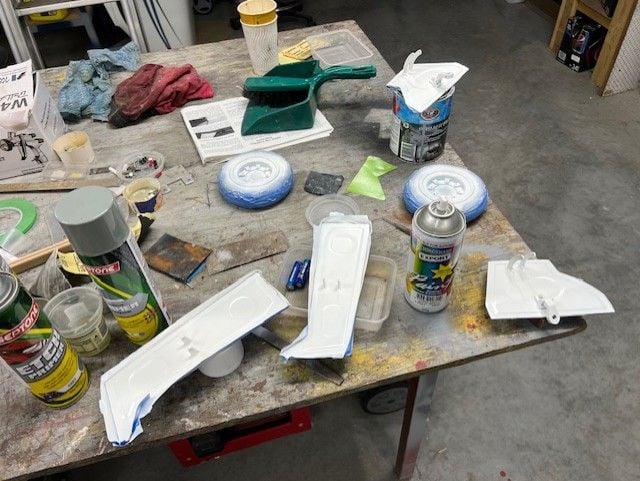
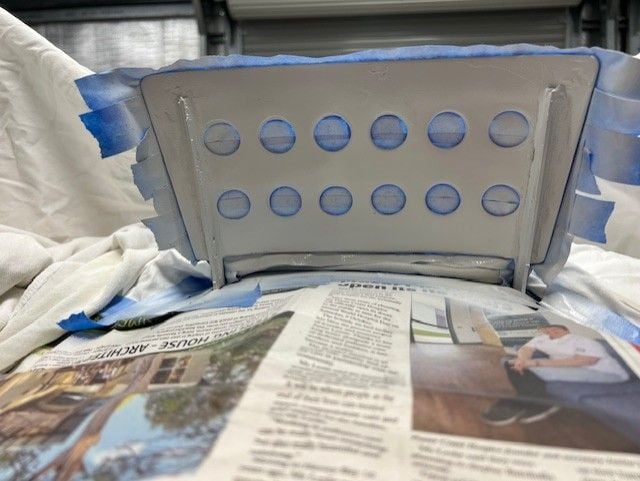
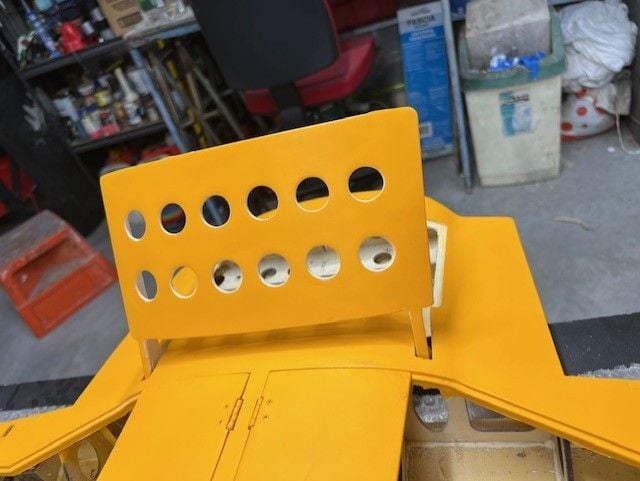
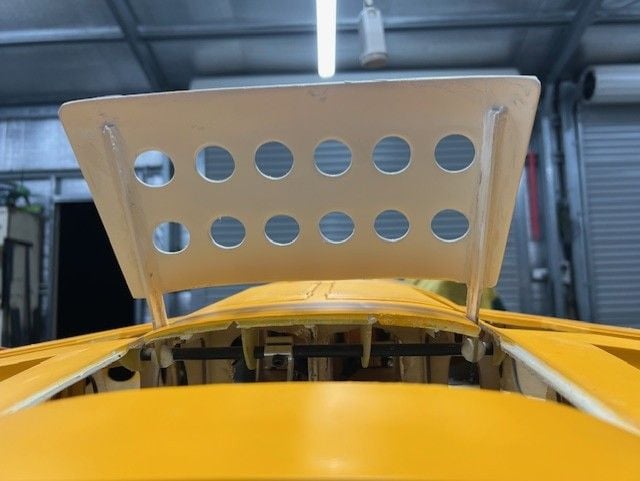
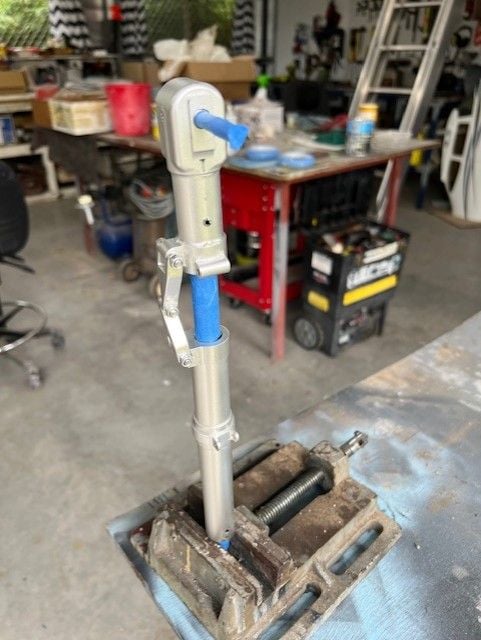
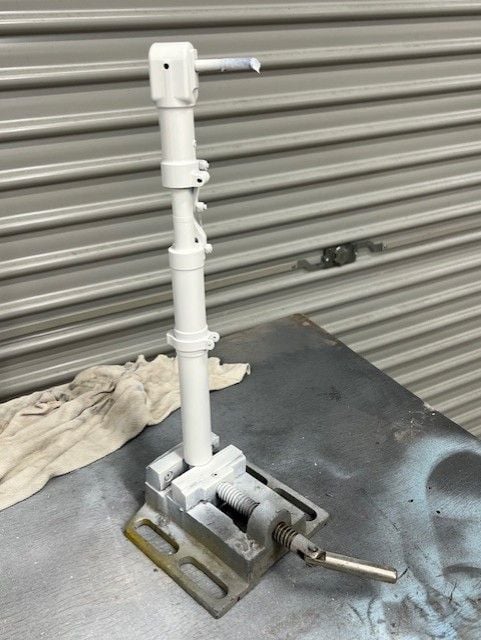
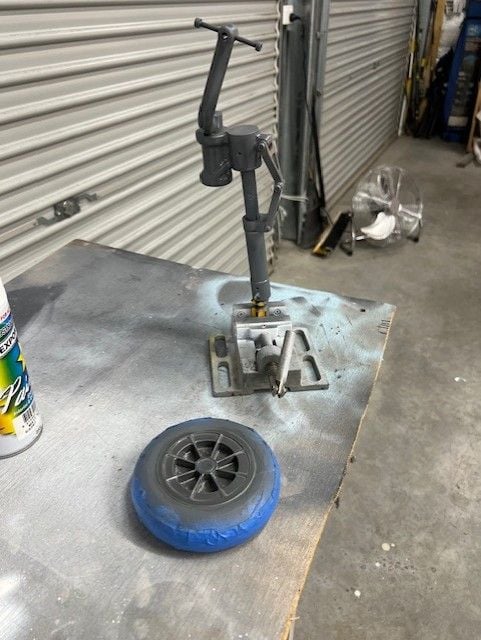
More progress. Painting of wheels, oleo legs. Almost forgot to do the nose one! I have etch primer on that now.
Painted the white on the inner doors as well.
Almost a disaster, I bought a second rattle can of matt white in a different brand as it was all I could find in the auto store and went to use it on one of the legs only to find it came out a cream colour instead of white and sprayed on with a very rough texture.
another trip into town which is a 5km round trip and bought 2 cans of different brands, Dulux and Rustoleum. I used the Dulux and it is a good white colour and seems to have same tint as the other I was using.
Wet sanded the leg and will spray that later today.
I have now got both long doors sorted, 2nd one did not take me long at all, about 30 mins.
Also need to set throws / end points for the inner gear door servos.
The following users liked this post:
totka (04-07-2024)
The following users liked this post:
totka (04-07-2024)
04-14-2024, 01:48 PM
#285
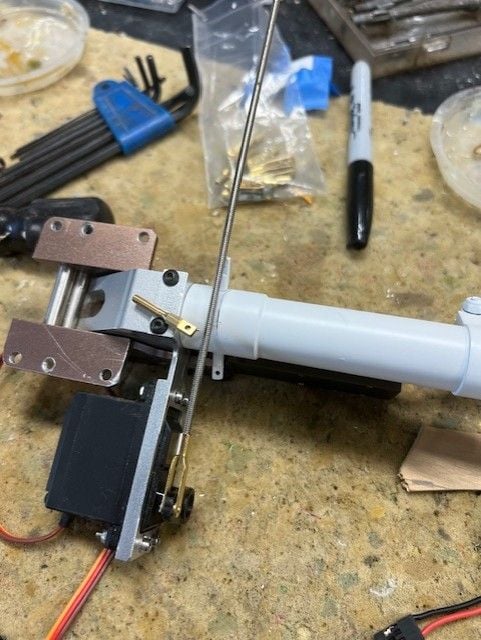
well trendsetters I had a productive weekend on the T28. Lots of fiddy stuff done.
Nose gear steering sorted. Had to get a M3 tap but hardware had those.
Need some #8 x 1/2 socket head sheet metal screws as I am out. Those are on order.
Once I have those I can mount the nose gear.
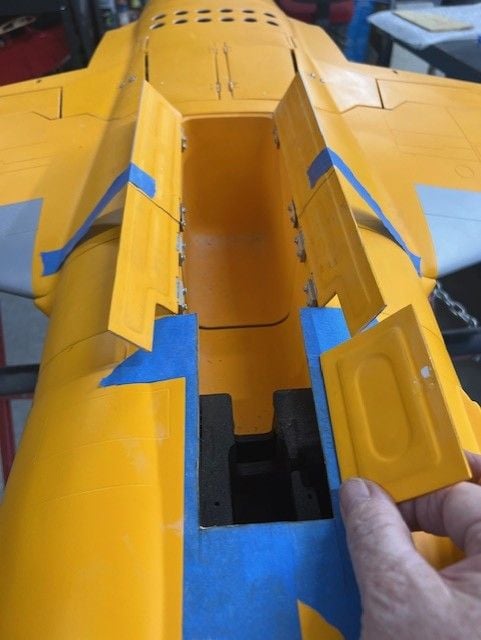
Been working on nose gear doors, I have split them where the wing centre section comes apart, will have a nylon "tongue" inserted so that the front door drives the rear.
Not sure how easy it will be to line those doors up while fitting the centre section. We shall see.
Starting to work on front section doors and the little door right at the front that is on the cowl. The very front door will need to be driven off a servo.
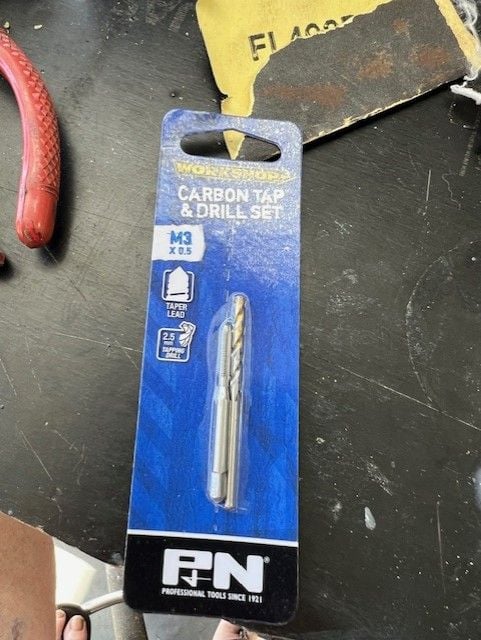
Nose gear steering sorted. Had to get a M3 tap but hardware had those.
Need some #8 x 1/2 socket head sheet metal screws as I am out. Those are on order.
Once I have those I can mount the nose gear.
Been working on nose gear doors, I have split them where the wing centre section comes apart, will have a nylon "tongue" inserted so that the front door drives the rear.
Not sure how easy it will be to line those doors up while fitting the centre section. We shall see.
Starting to work on front section doors and the little door right at the front that is on the cowl. The very front door will need to be driven off a servo.
The following users liked this post:
totka (04-17-2024)
04-17-2024, 02:35 PM
#286
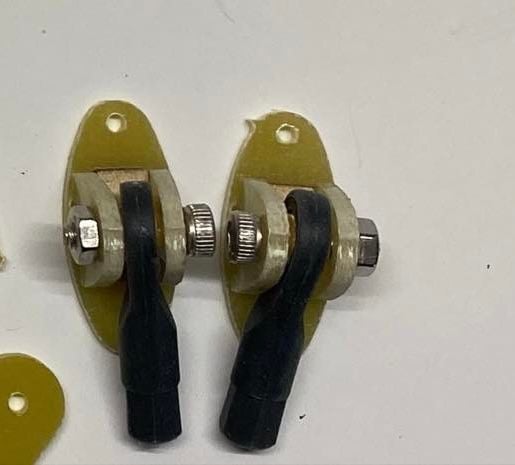
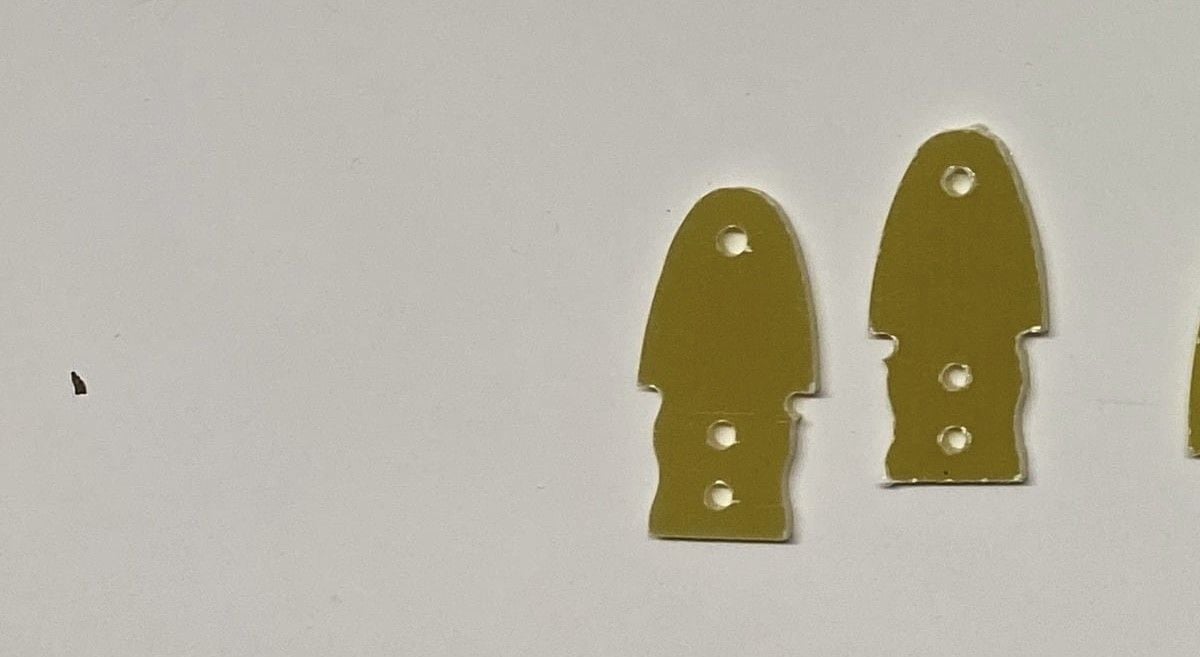
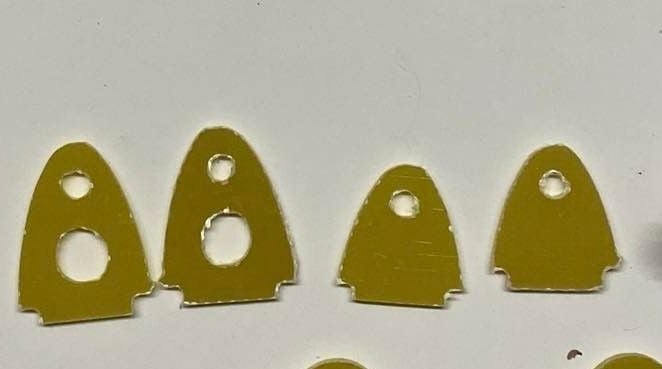
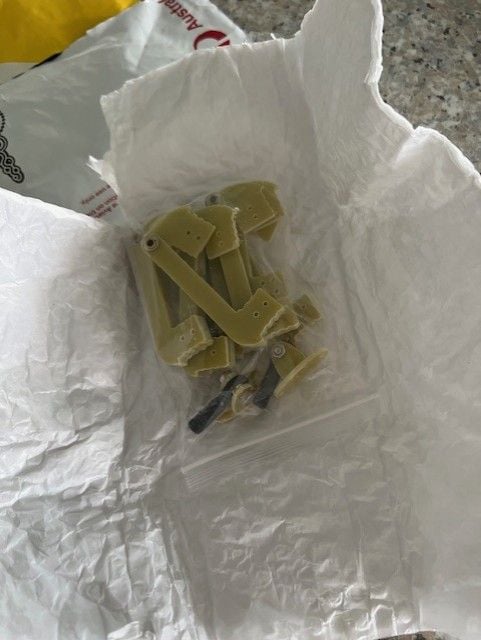
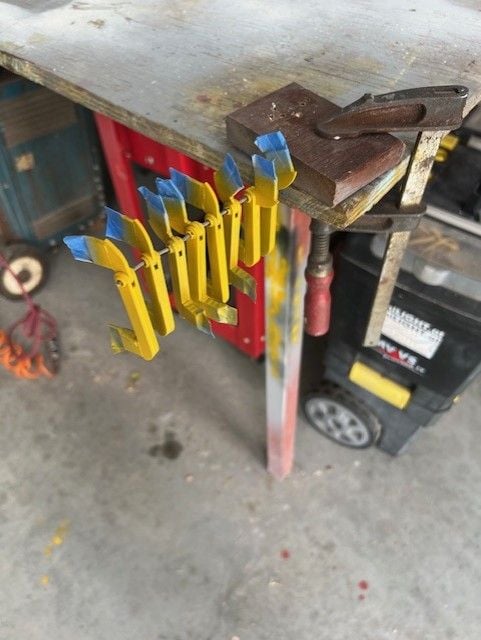
Been trying to get some missing and incorrect fiberglass parts sorted by the distributor here, Dragon RC.
first he says he will get the parts in and then advises he has them, but keeps asking what is missing, you tell him yet again and this repeats in a circle, then he says I am asking for extra parts. No Michael Liu of DragonRC those are missing parts and the horns supplied are far too big and wrong.
So in the end I complain his FB page for TopRC downunder and he blocks me. Tells everyone all they need to know, he is dodgy as.
I even offered to pay for these items, probably $20 worth at most.
Can anyone help out with these missing bits? Even just the two flap linkage fitting will get me out of trouble.
thanks
The following users liked this post:
totka (04-17-2024)
04-21-2024, 01:11 PM
#287
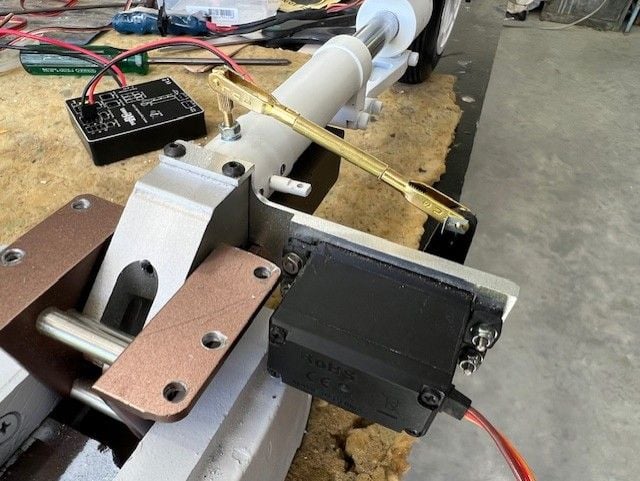
Did a bit more on front doors, they are all on. Fabricated the front door horn and have glued those on with hysol.
Need to make up a mount for a mini servo to drive the front door. Will use a JR matchbox slaved to the nose door output of the controller. As I need to adjust throws on 3 doors I am hoping this will do this.
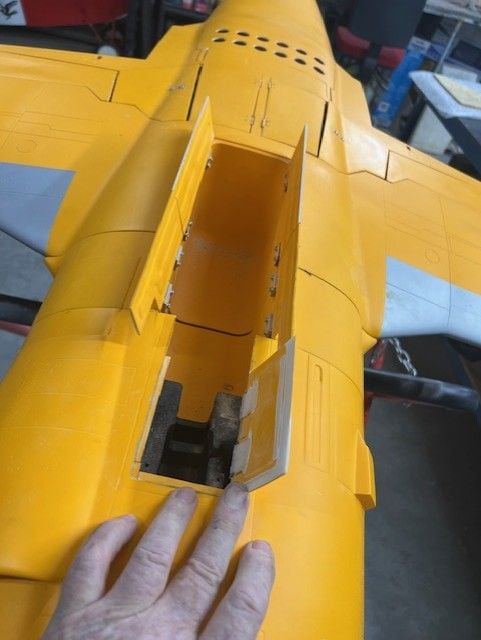
Need to make up a mount for a mini servo to drive the front door. Will use a JR matchbox slaved to the nose door output of the controller. As I need to adjust throws on 3 doors I am hoping this will do this.
04-23-2024, 03:57 PM
#288
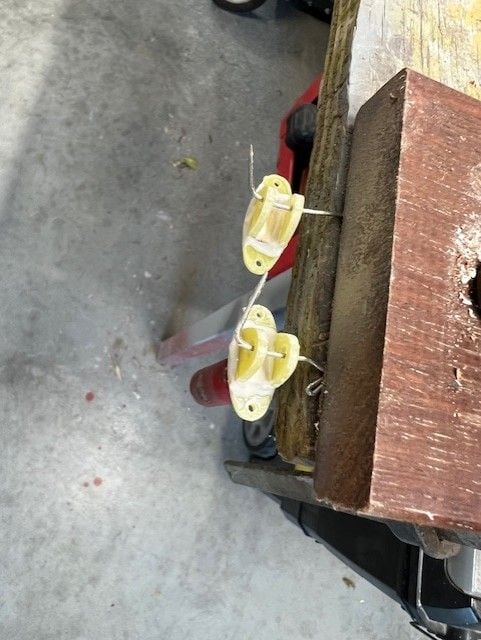
So low and surprise a parcel arrives yesterday that contained some of the missing parts but still many of these small G10 items missing.
At least I can now move onto to the flaps.
Note that the flap linkage fitting needs to be well glued with hysol, I will be just screwing it in place to get flaps set up then I will encase it in hysol once I get flaps working correctly.
As for the other missing parts a kind person has offered to fabricate these for me of which I am very grateful.
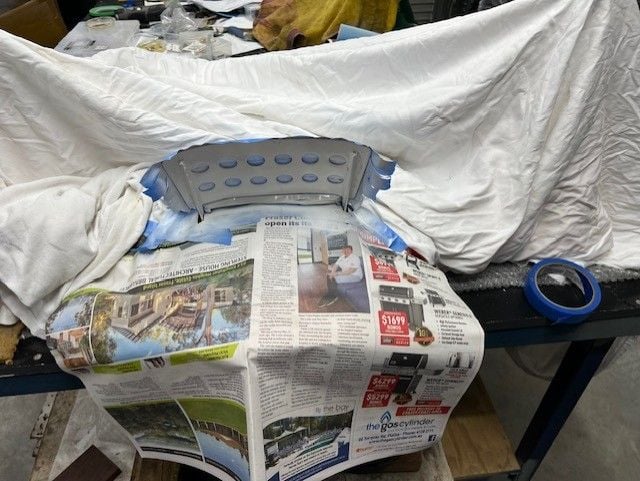
Have started to paint nose gear doors
At least I can now move onto to the flaps.
Note that the flap linkage fitting needs to be well glued with hysol, I will be just screwing it in place to get flaps set up then I will encase it in hysol once I get flaps working correctly.
As for the other missing parts a kind person has offered to fabricate these for me of which I am very grateful.
Have started to paint nose gear doors
04-25-2024, 02:28 PM
#289
Progress yesterday and first big stuff up.
Gear doors have been sprayed white, have not refitted just yet as I want to get flaps sorted.
Elevator linkages are done though not fully adjusted. Using some top end ball links I got from DA for those.
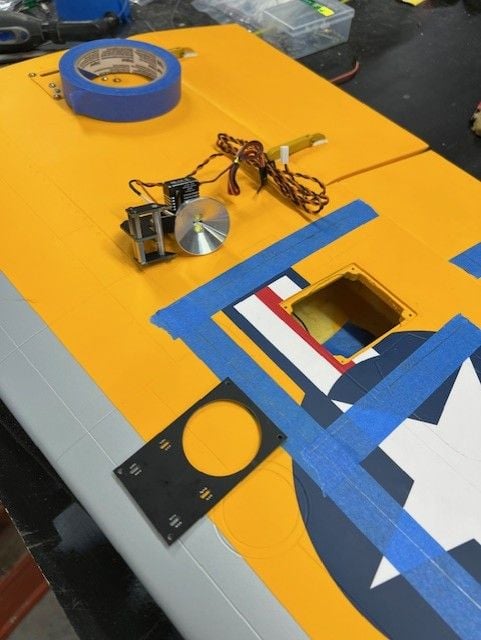
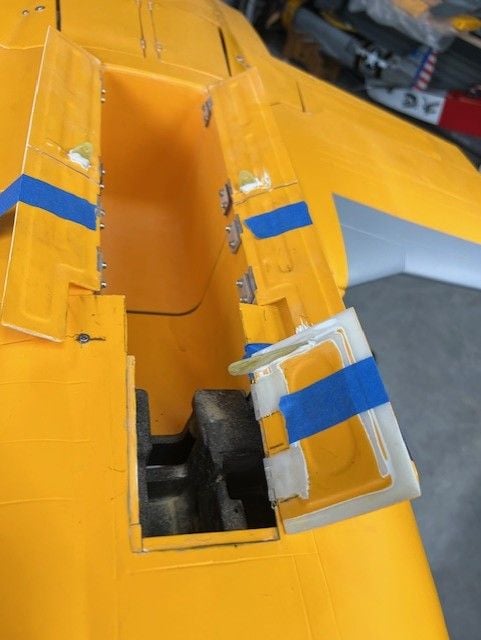
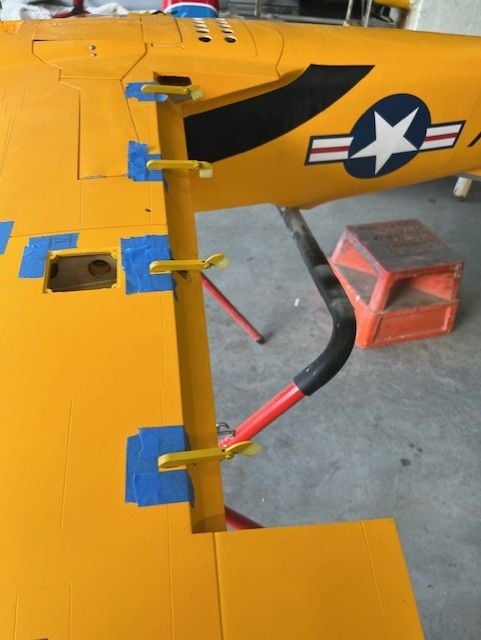
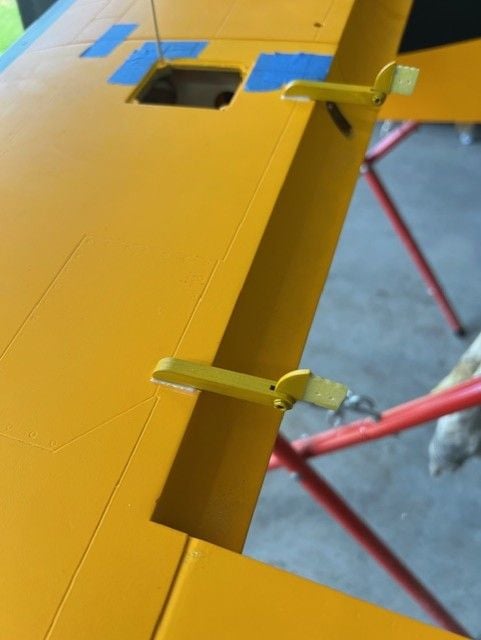
Now to the stuff up. I had expected that for the flap half that has the servo arm linkage to drive it that in behind the flap leading edge I would find plywood to screw the flap linkage fitting to. Wrong.
I had marked the attachment point outboard about 7mm to gain clearance where the rod comes out of the wing due to the block of wood in the way, said block is part of the clamp that locks the wing half in place so did not want to mess with that.
I marked where the servo arm would go and proceeded to open up the leading edge of the flap half but it is solid balsa behind it, I kept opening it up and going a bit deeper and still no plywood, just balsa then I hit the edge of this block of balsa.
Bugger ok lets see if I can still get this sorted.
As I found out you need this linkage fitting to be fully recessed within the flap or the flap will not rotate, furthermore it needed to be towards the top surface of the flap as much as possible in order to get clearance for the torque rod that drives the flap.
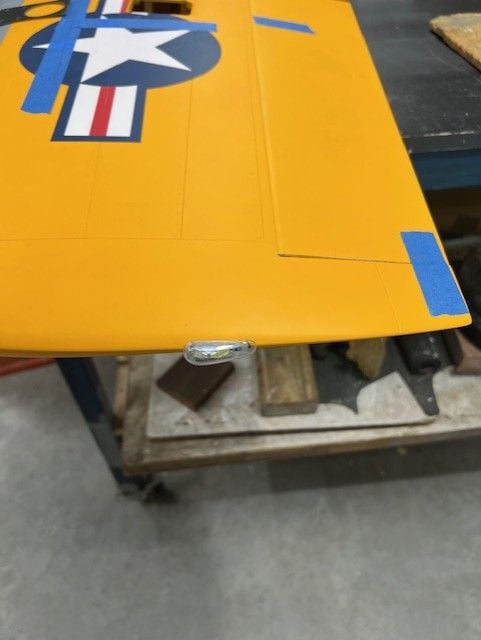
So I ended up with a messy hole but managed to get the fitting in place and secure with long screws and loads of hysol to encapsulate it. I found in order to get correct amount of flap travel that I had to open up the hole where the torque rod goes on an acute angle as the flap deploys. Not sure if others had to do similar or not? Anyway it will work but is likely to show an ugly hole when the flap is down.
I will have a look and see how it looks, if it annoys me I will fill in the hole with body filler but leaving necessary clearance for the rod.
Gear doors have been sprayed white, have not refitted just yet as I want to get flaps sorted.
Elevator linkages are done though not fully adjusted. Using some top end ball links I got from DA for those.
Now to the stuff up. I had expected that for the flap half that has the servo arm linkage to drive it that in behind the flap leading edge I would find plywood to screw the flap linkage fitting to. Wrong.
I had marked the attachment point outboard about 7mm to gain clearance where the rod comes out of the wing due to the block of wood in the way, said block is part of the clamp that locks the wing half in place so did not want to mess with that.
I marked where the servo arm would go and proceeded to open up the leading edge of the flap half but it is solid balsa behind it, I kept opening it up and going a bit deeper and still no plywood, just balsa then I hit the edge of this block of balsa.
Bugger ok lets see if I can still get this sorted.
As I found out you need this linkage fitting to be fully recessed within the flap or the flap will not rotate, furthermore it needed to be towards the top surface of the flap as much as possible in order to get clearance for the torque rod that drives the flap.
So I ended up with a messy hole but managed to get the fitting in place and secure with long screws and loads of hysol to encapsulate it. I found in order to get correct amount of flap travel that I had to open up the hole where the torque rod goes on an acute angle as the flap deploys. Not sure if others had to do similar or not? Anyway it will work but is likely to show an ugly hole when the flap is down.
I will have a look and see how it looks, if it annoys me I will fill in the hole with body filler but leaving necessary clearance for the rod.
04-27-2024, 01:55 PM
#290
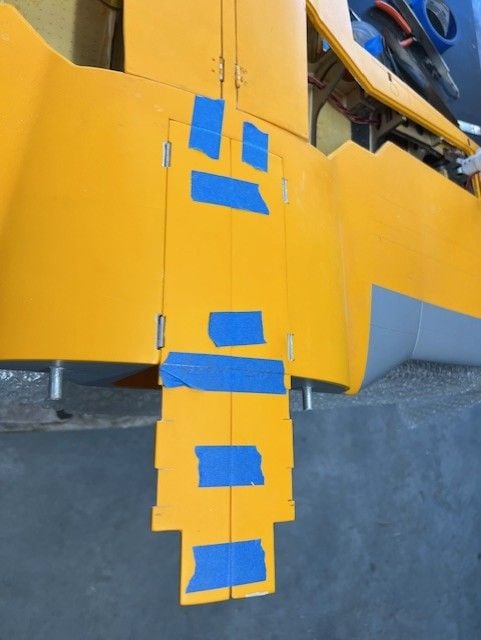
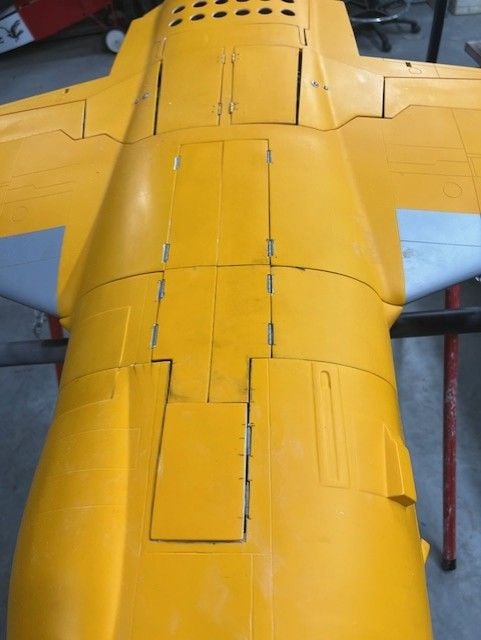
Note to self, do flaps and their hinges all in one go, do not glue hinges to main wing and think they would all be aligned. Close but not quite on left side.
Opened up slots a bit on the inner flap half. There was quite a bit of resin built up at the root from manufacturing which needed to be relieved.
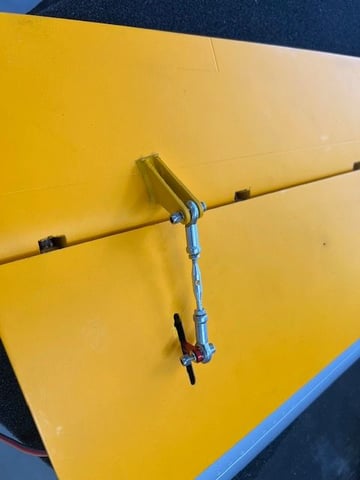
The hole I had to open up on the first flap linkage has been filled in and some paint applied so it does not look as bad as it was.
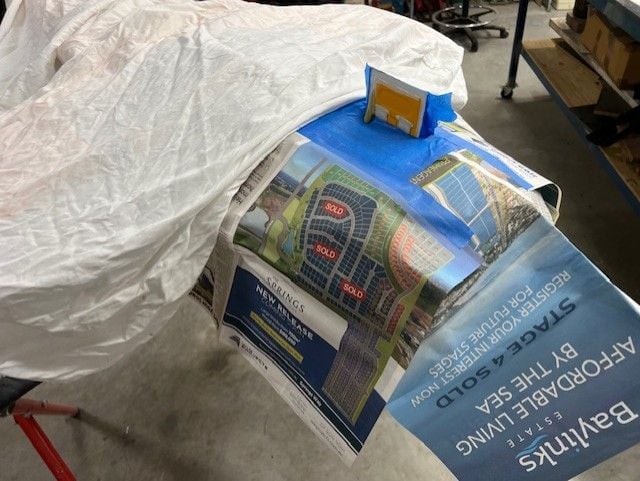
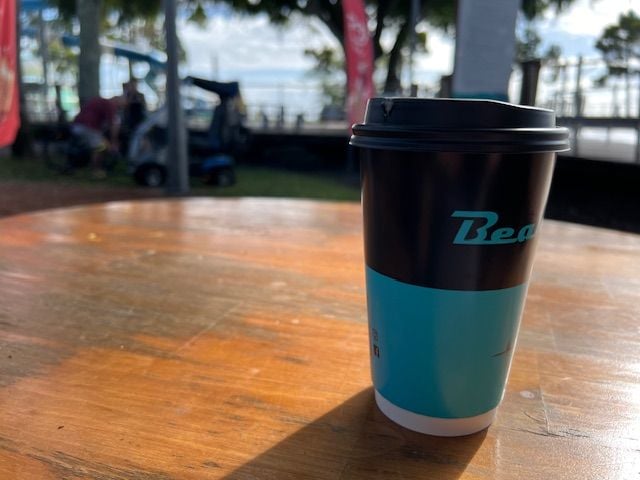
Needed a coffee by the bay to chill.
yup I put tape under the hinge and hopefully the hysol has only gone where it is meant to go!
Will see how it works soon.
Corefeeeeeee
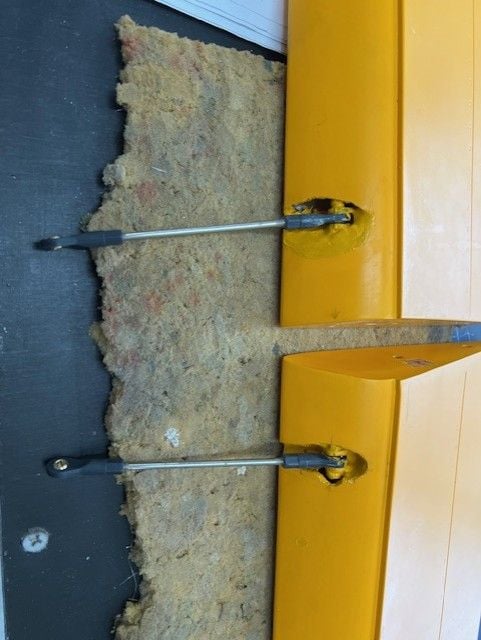
Opened up slots a bit on the inner flap half. There was quite a bit of resin built up at the root from manufacturing which needed to be relieved.
The hole I had to open up on the first flap linkage has been filled in and some paint applied so it does not look as bad as it was.
Needed a coffee by the bay to chill.
yup I put tape under the hinge and hopefully the hysol has only gone where it is meant to go!
Will see how it works soon.
Corefeeeeeee
04-28-2024, 03:09 PM
#291
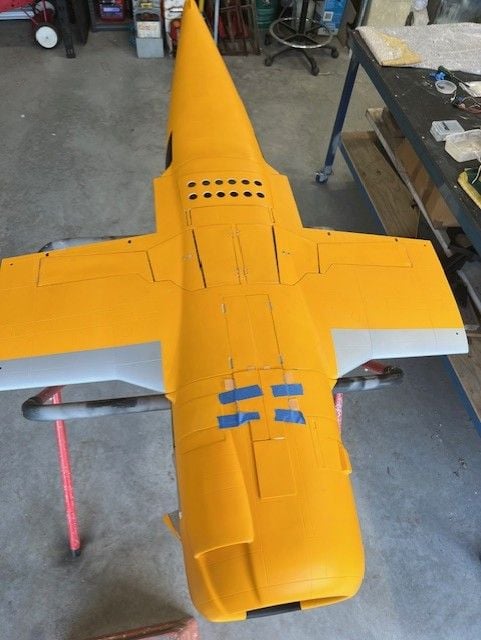
Flaps are working ok. Had to do more relieving due to some top edge binding. Tape some 240 grit over the leading edge curve of the flap and rotated the flap back and forth for a few minutes which gave a nice even sand and sorted out the issue.
Tail light is on and rudder fitted, had to do some relieving on the flap as well to get a decent amount of defection each way.
Rudder cables are next.
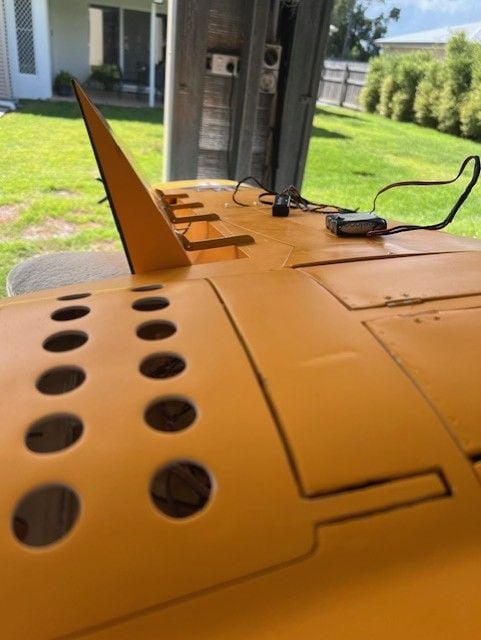
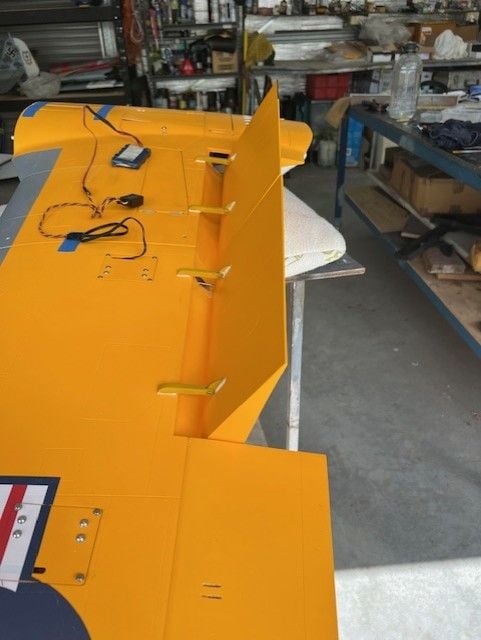
Tail light is on and rudder fitted, had to do some relieving on the flap as well to get a decent amount of defection each way.
Rudder cables are next.