ESM F7F Tigercat Build
 07-05-2017, 01:56 AM
#26

Thread Starter

Semper Fi.

 09-29-2017, 01:01 AM
#29
Thread Starter
As I had mentioned, I finished preparing my CARF Spark for the re-maiden which went well. It is not quite as fast as it was new but it is still very fast. I was preparing to resume the build on the Tigercat but was interrupted by one of those pesky hurricanes named Irma. Unfortunately we took a direct hit from the eye of the storm. I am afraid that while my home was spared, my garage/workshop was not and was completely flooded. We like most were without power and cable services for several days. I just got my internet back yesterday so I haven't had the chance to update anything. Sorry to say but my RC hobby will be suspended for some time while I have my workshop repaired and back to normal. I hope to resume the build soon.
10-13-2017, 09:50 AM
#30


Join Date: Sep 2004
Location: Atkins, IA
Posts: 19
Likes: 0
Received 0 Likes
on
0 Posts
ftjets,What are the specs and what brand of servo are you using? Had my TC a couple years,slowly getting around to the build.Thanks Dean
Last edited by 70sflyer; 10-13-2017 at 09:55 AM.
10-14-2017, 02:29 AM
#31
Thread Starter
Dean,
I haven't decided on the exact servos yet but I have been a devoted Futaba fan since 1979 so they will in all probability be Futaba brand. I will probably accumulate them step by step as I progress on the build and decide which ones I will need for that part of the process. I'm slowly getting my workshop back in order and should be able to resume the build soon.
I haven't decided on the exact servos yet but I have been a devoted Futaba fan since 1979 so they will in all probability be Futaba brand. I will probably accumulate them step by step as I progress on the build and decide which ones I will need for that part of the process. I'm slowly getting my workshop back in order and should be able to resume the build soon.
10-14-2017, 07:07 AM
#32
Join Date: Sep 2004
Location: Atkins, IA
Posts: 19
Likes: 0
Received 0 Likes
on
0 Posts
ftjets,thanks for the info,I have been a Fatuaba fan also.Have the 7C xmitter but looking to buy new one this winter.Sorry to here about your work shop.Went through a flood in 2008.Thanks
11-23-2017, 01:48 PM
#33
My Feedback: (11)
Join Date: Apr 2002
Location: Smithfield, VA
Posts: 1,056
Likes: 0
Received 0 Likes
on
0 Posts
Anyone tried to order one from this site?
https://www.newmaxano.com/esm-f7f-ti...rf-p-2585.html
tony
https://www.newmaxano.com/esm-f7f-ti...rf-p-2585.html
tony
 05-22-2018, 08:31 AM
#35

John
Few shots of the batteries /controller located in the nacelles
how i use springs for the small nose gear doors
With the Sierra gear i had to move then to another location because of the thickness of tires,and strut
BTW my wing tube measures 30 mm a little larger than 1 1/8 "
Did you do a sun test ?
Semper Fi
Joe
05-23-2018, 12:02 PM
#42
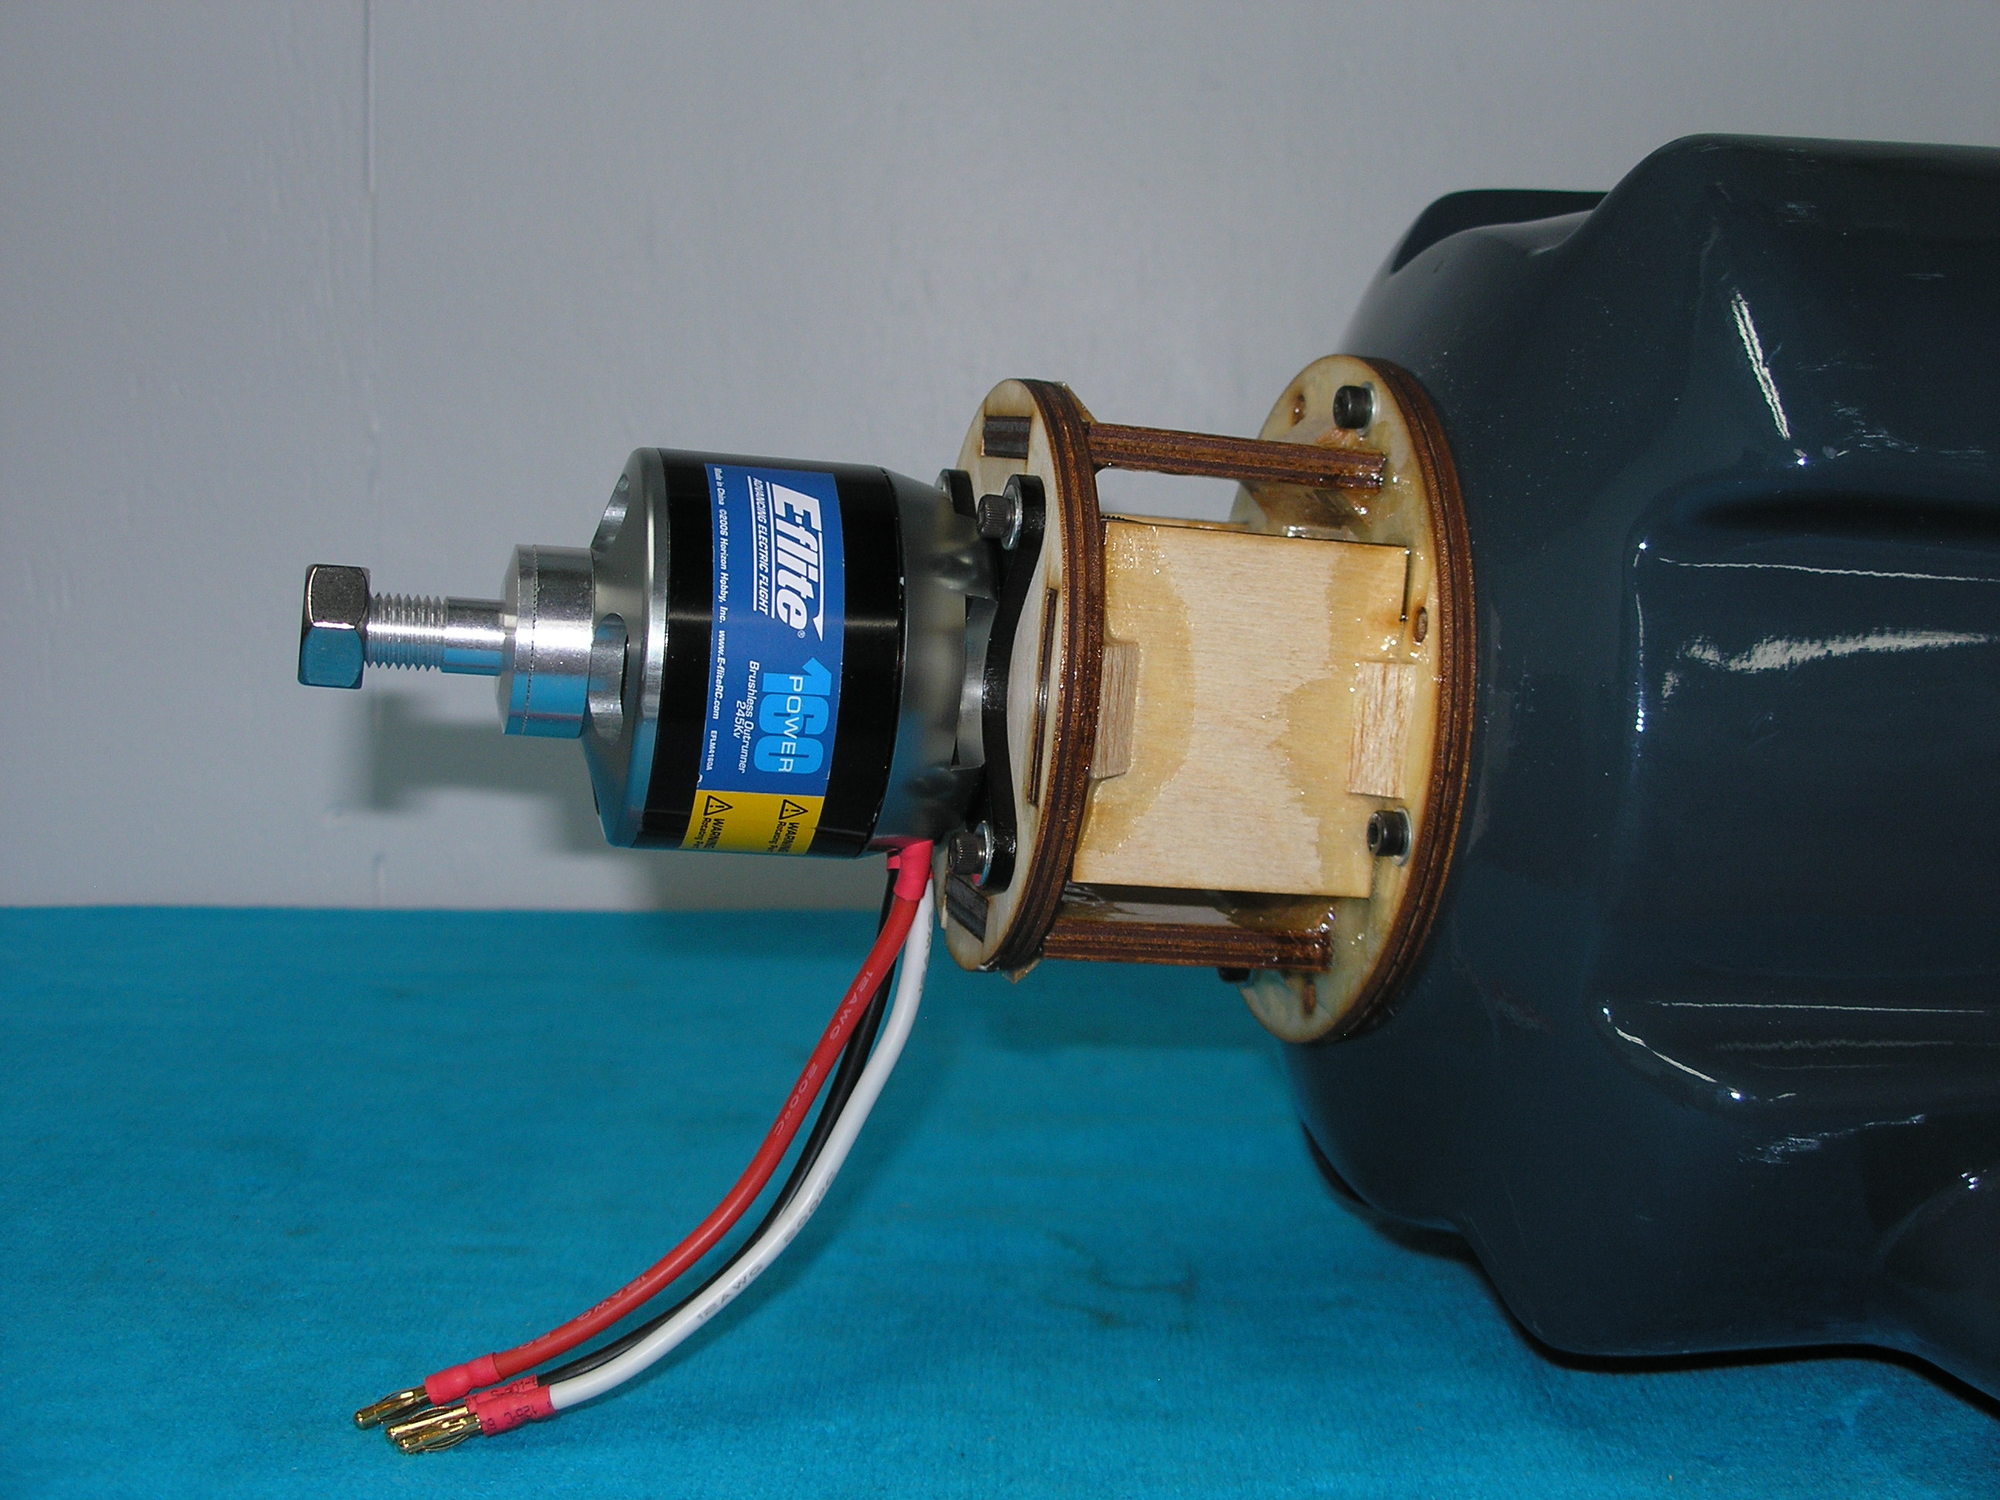
Good choice on the sierra gear/brakes & wheels, ,For my second one I ordered the esm electric ,which I returned and ordered the sierra .First one is electric powered e flight 110, with castle 120 amp controllers bela 18x10 props hope to have it airborne this weekend. Used two different schemes since you can old see one side at a time
Number two I removed the covering as the sun really plays hell with getting air blisters ,so I covered it with flight skins plan on using radial gas engines V 3 ' this one will be in Korean scheme WF on tail and FLAT paint
Semper Fi
Joe
Number two I removed the covering as the sun really plays hell with getting air blisters ,so I covered it with flight skins plan on using radial gas engines V 3 ' this one will be in Korean scheme WF on tail and FLAT paint
Semper Fi
Joe
07-01-2018, 11:17 AM
#45
Thread Starter
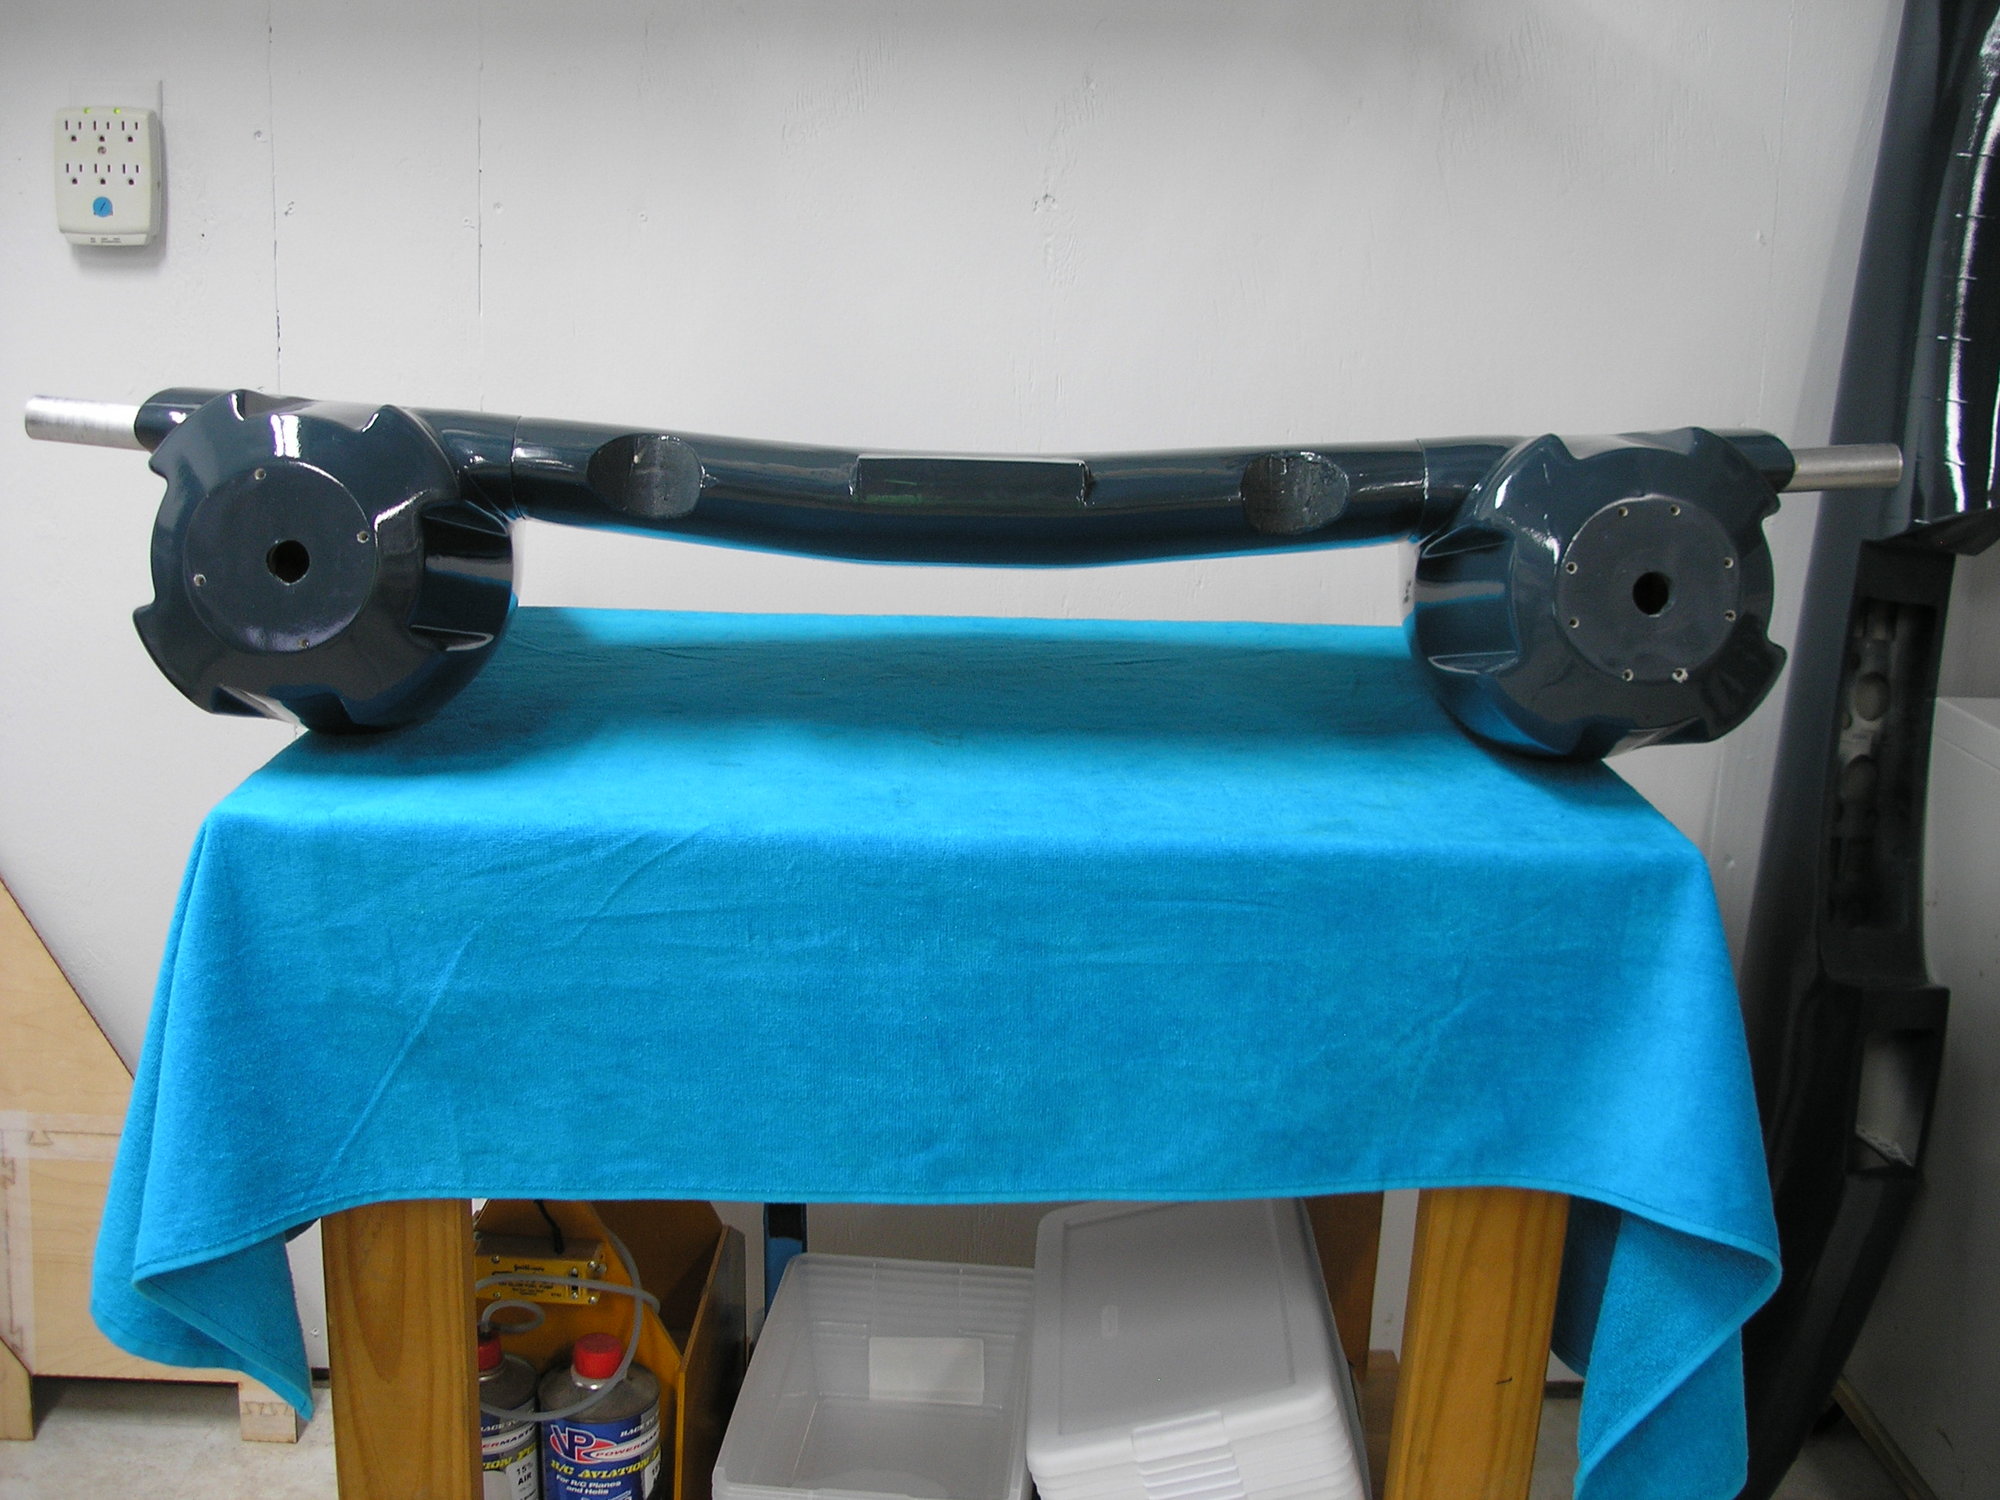
It took ten months but i finally have my workshop back to a usable condition. (way more than i expected) I have finally started on the build and made some progress. I will post some pics soon. Here is just a quick assemble i did to impress the brother-in-law.
07-01-2018, 12:53 PM
#46
Thread Starter
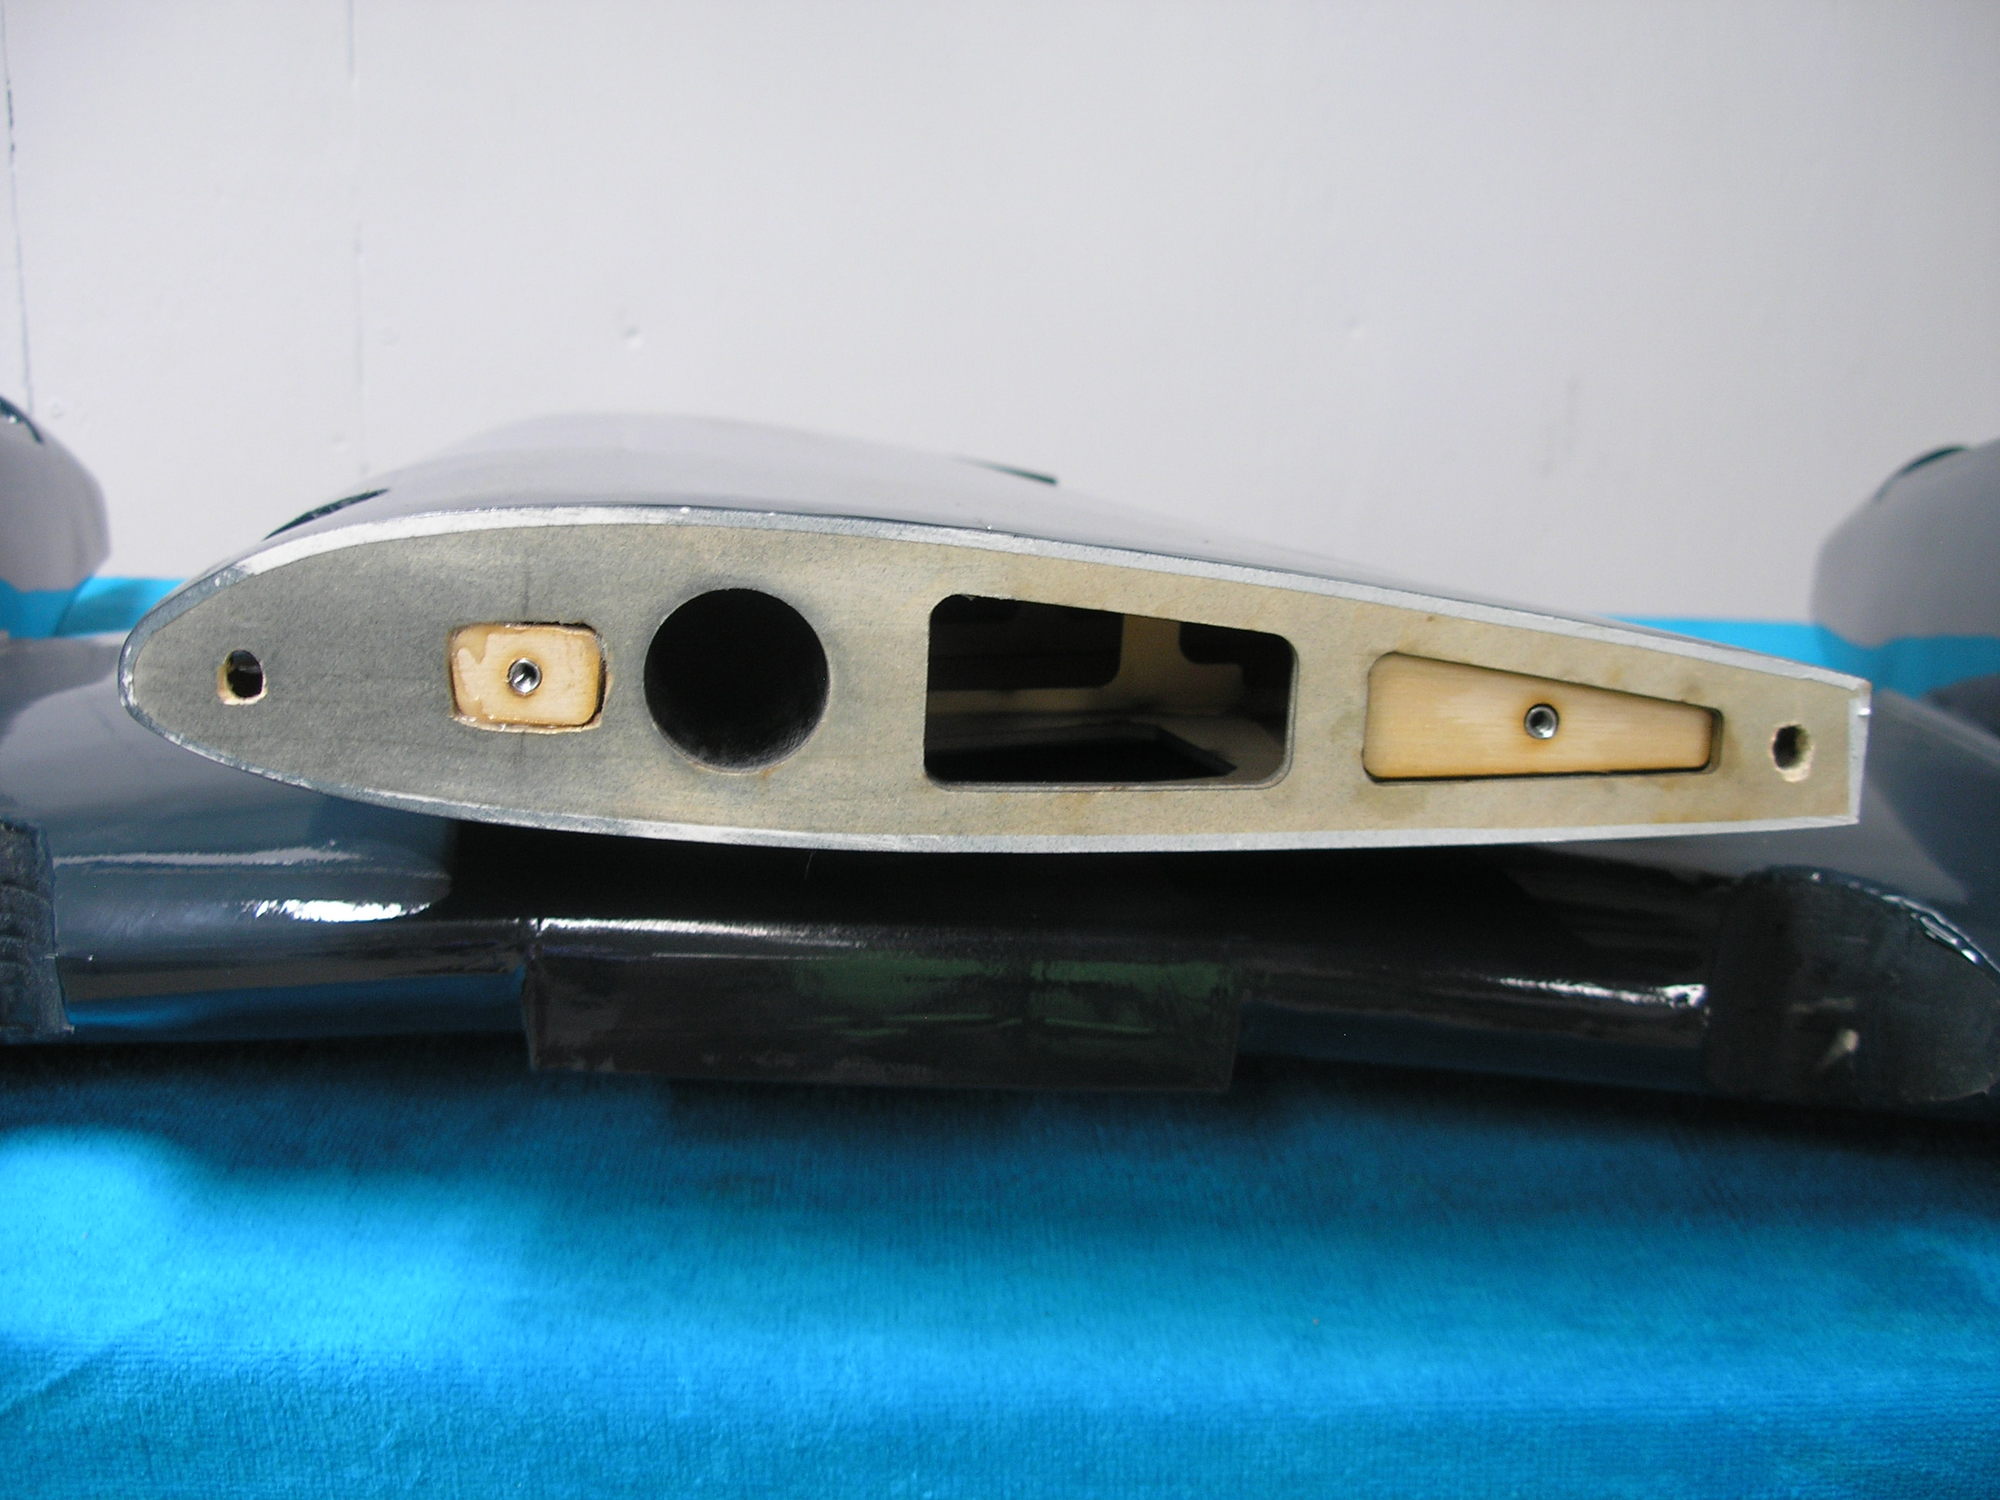
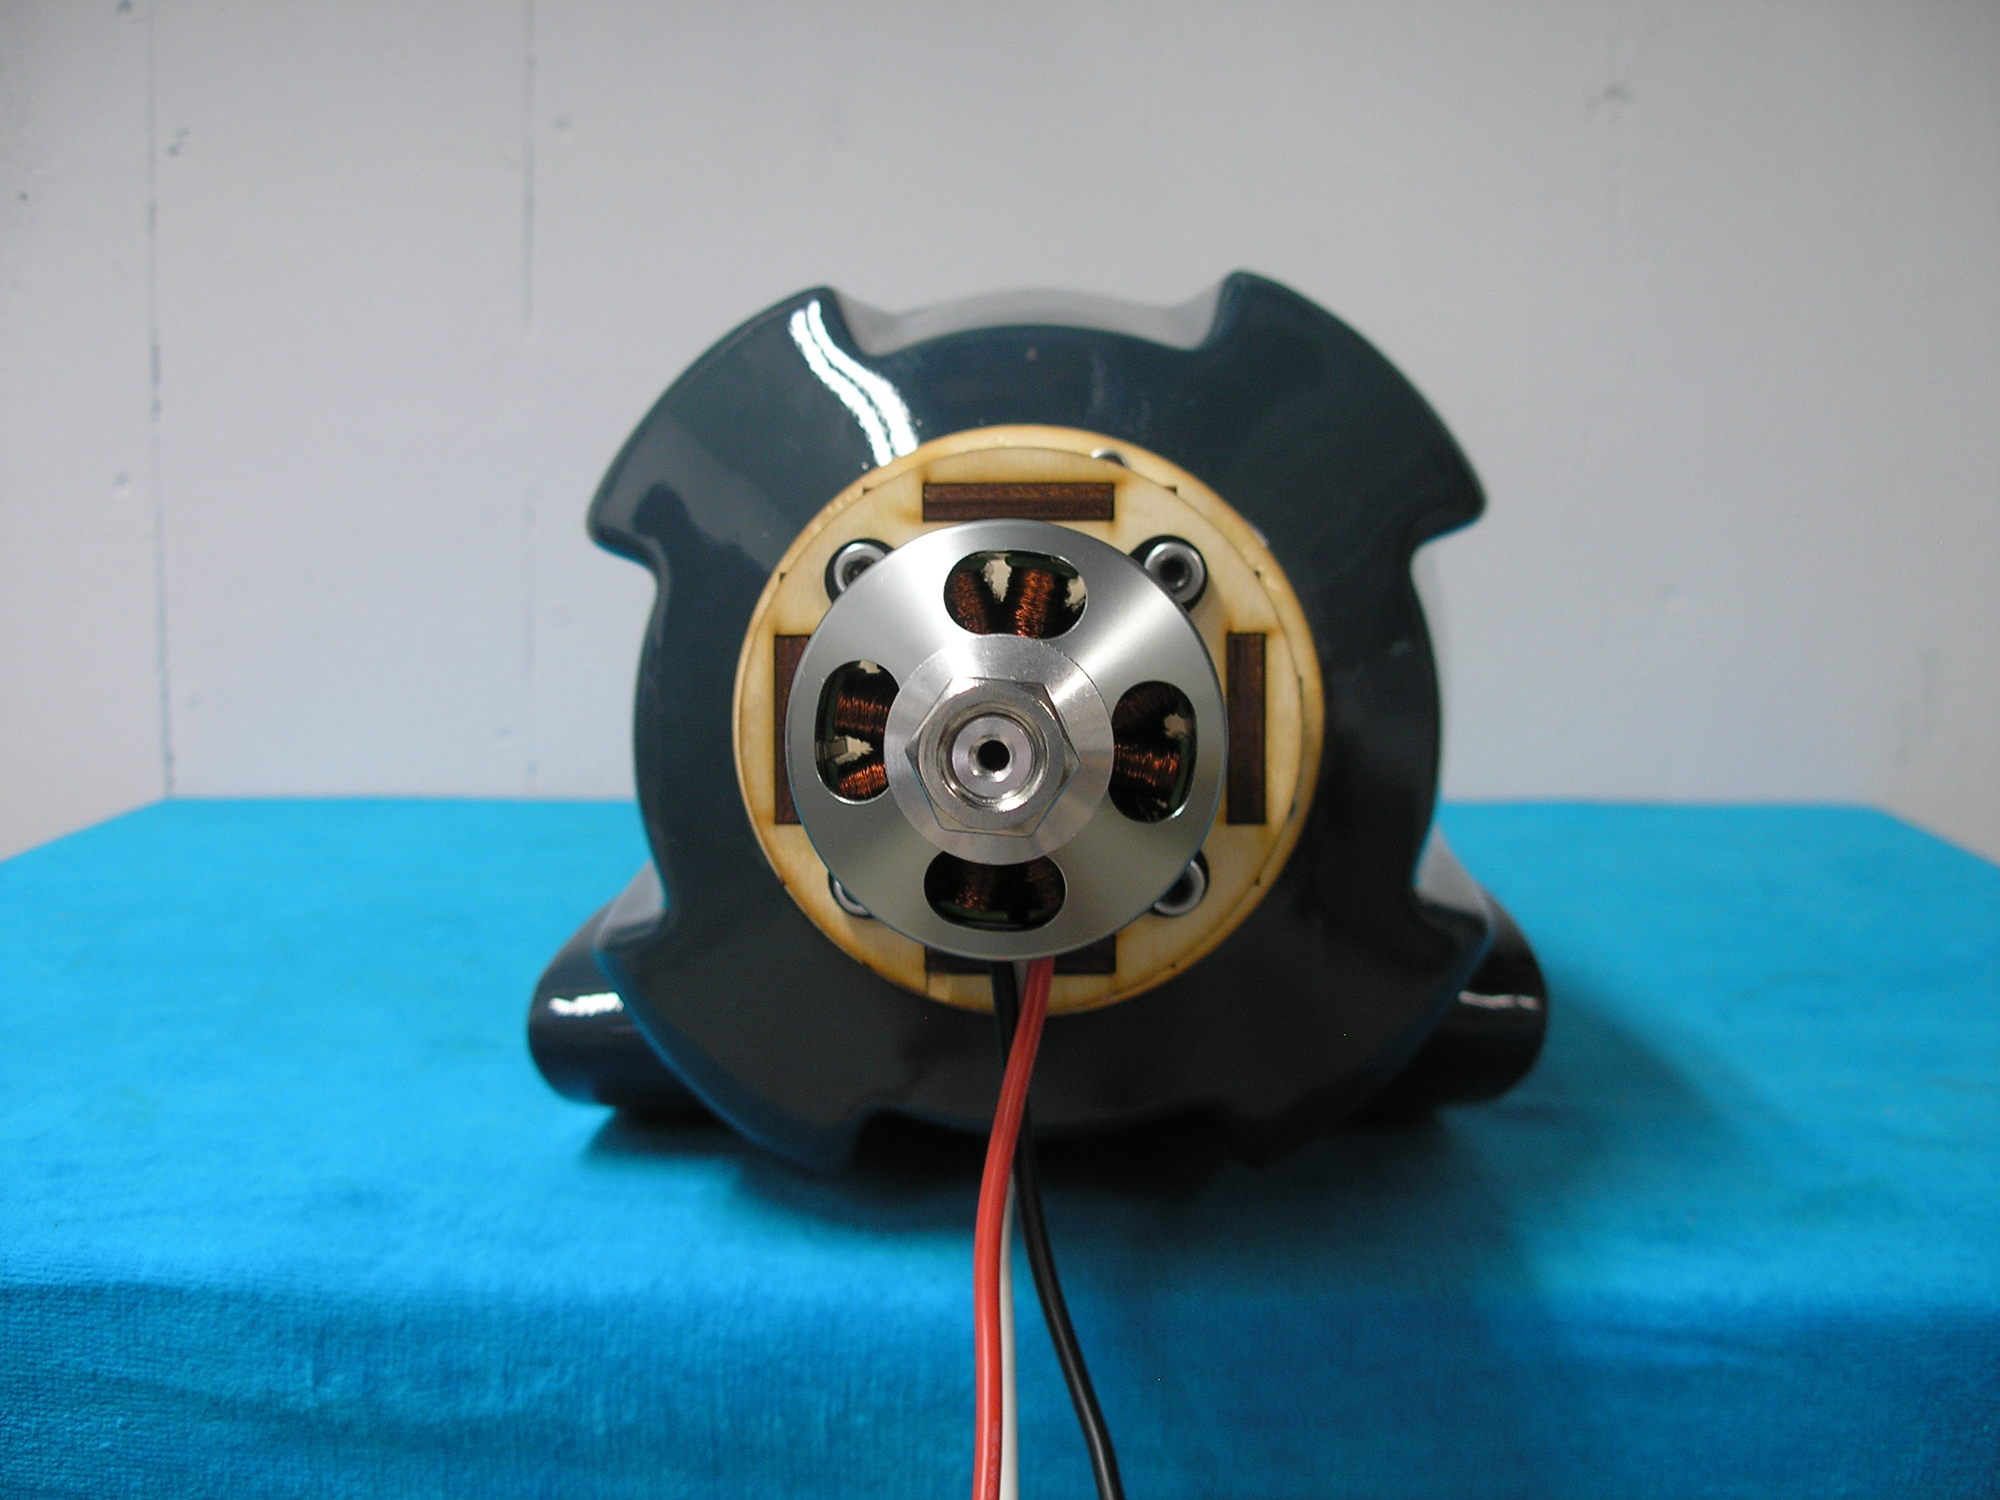
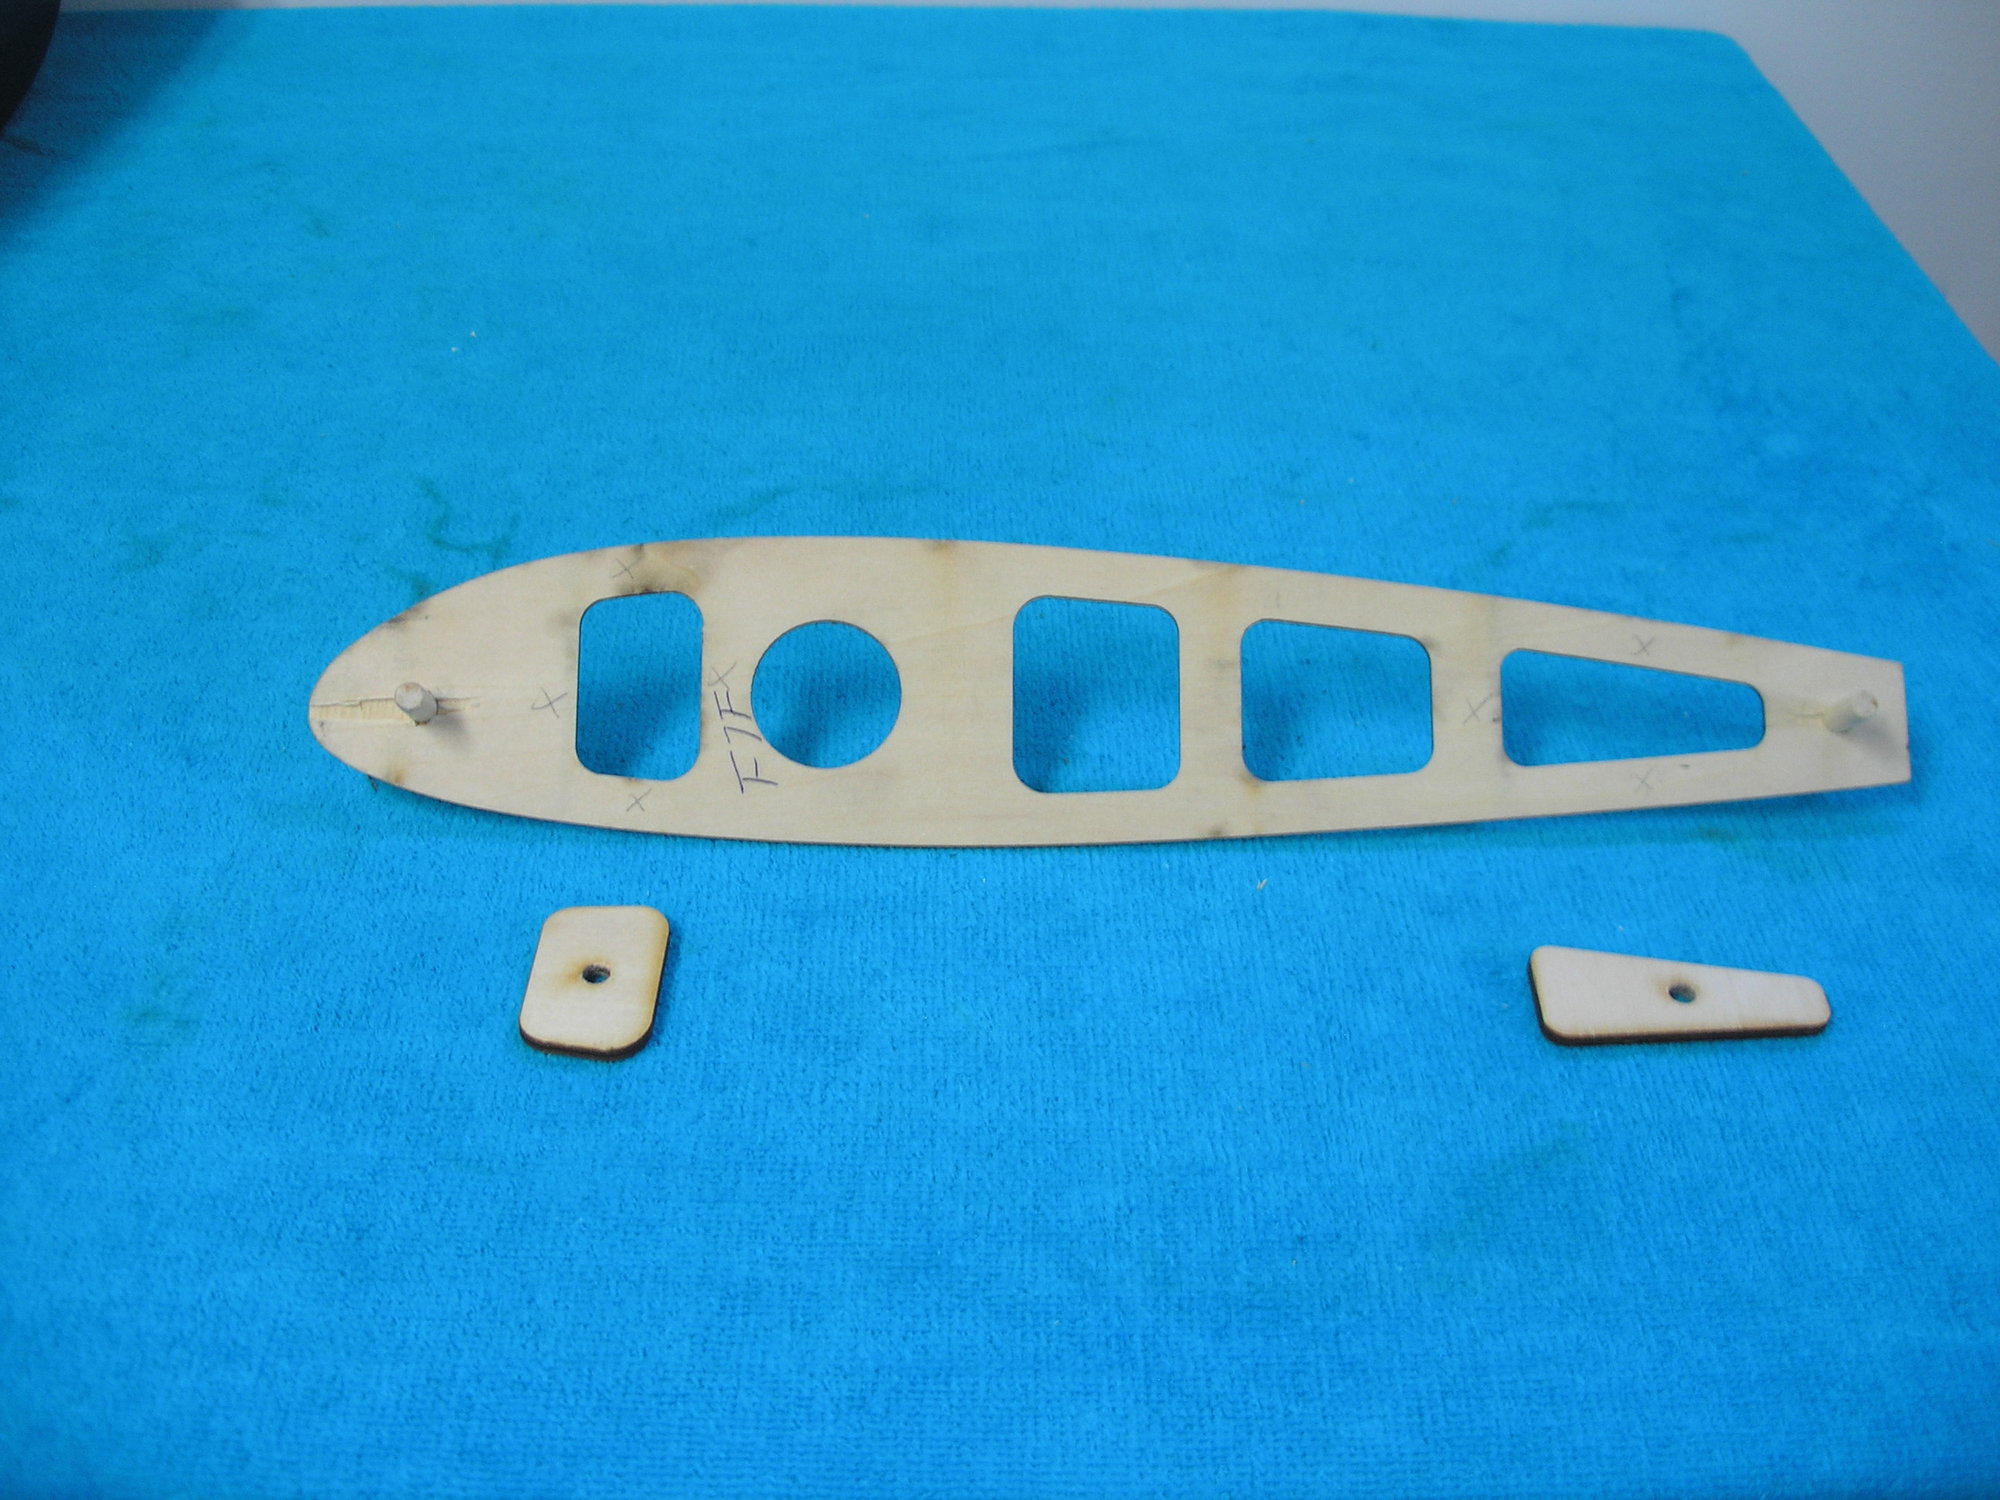
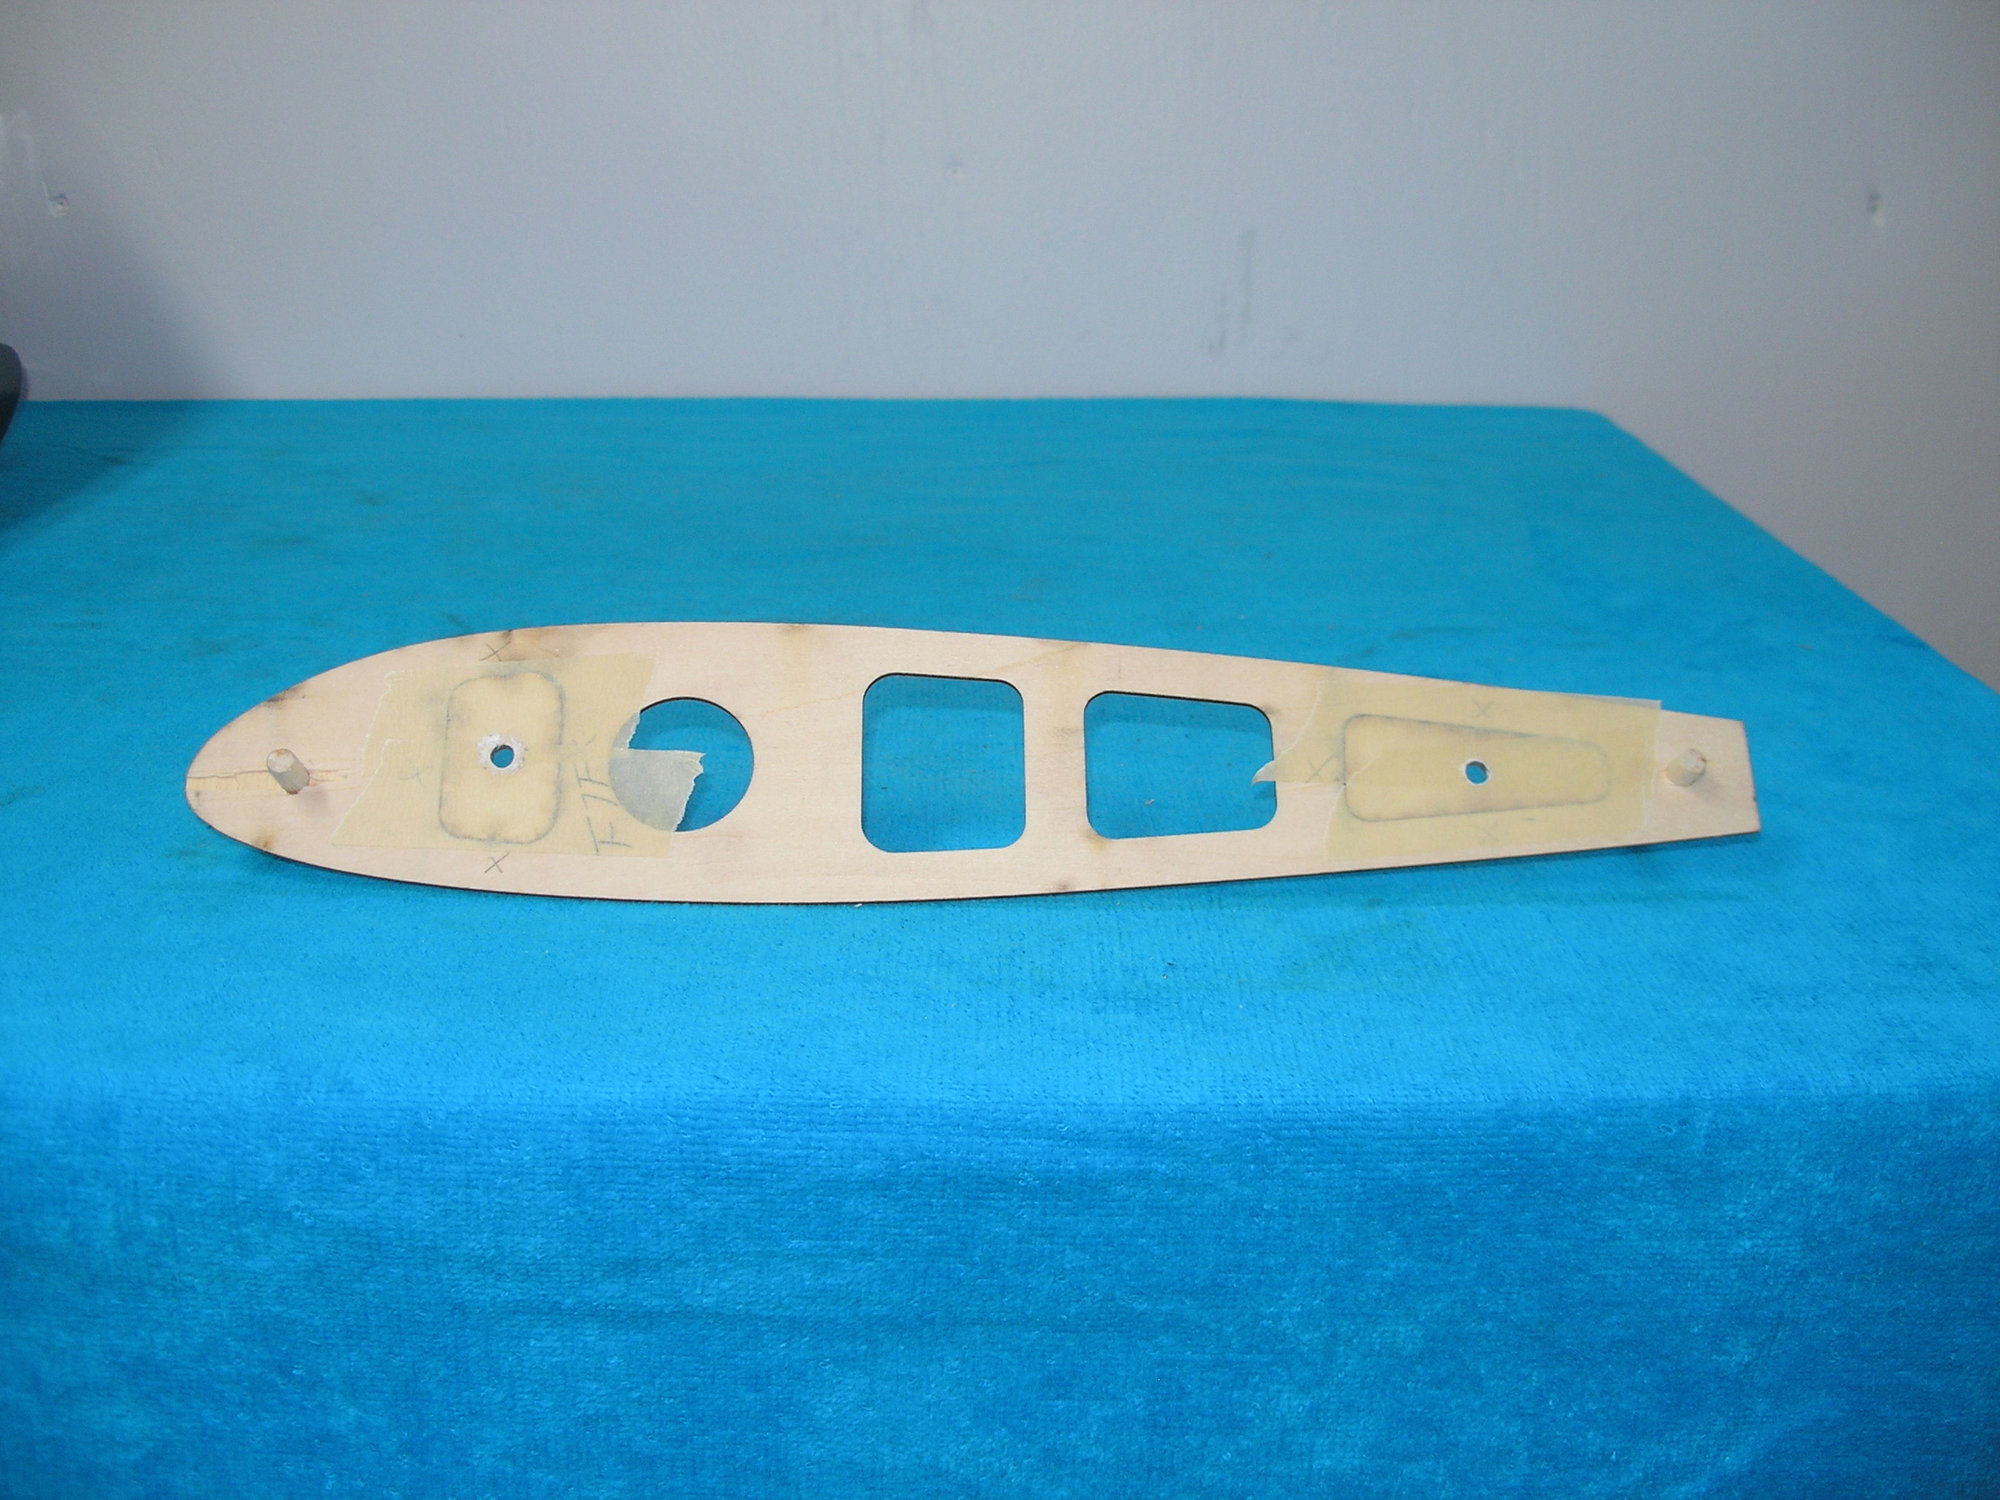
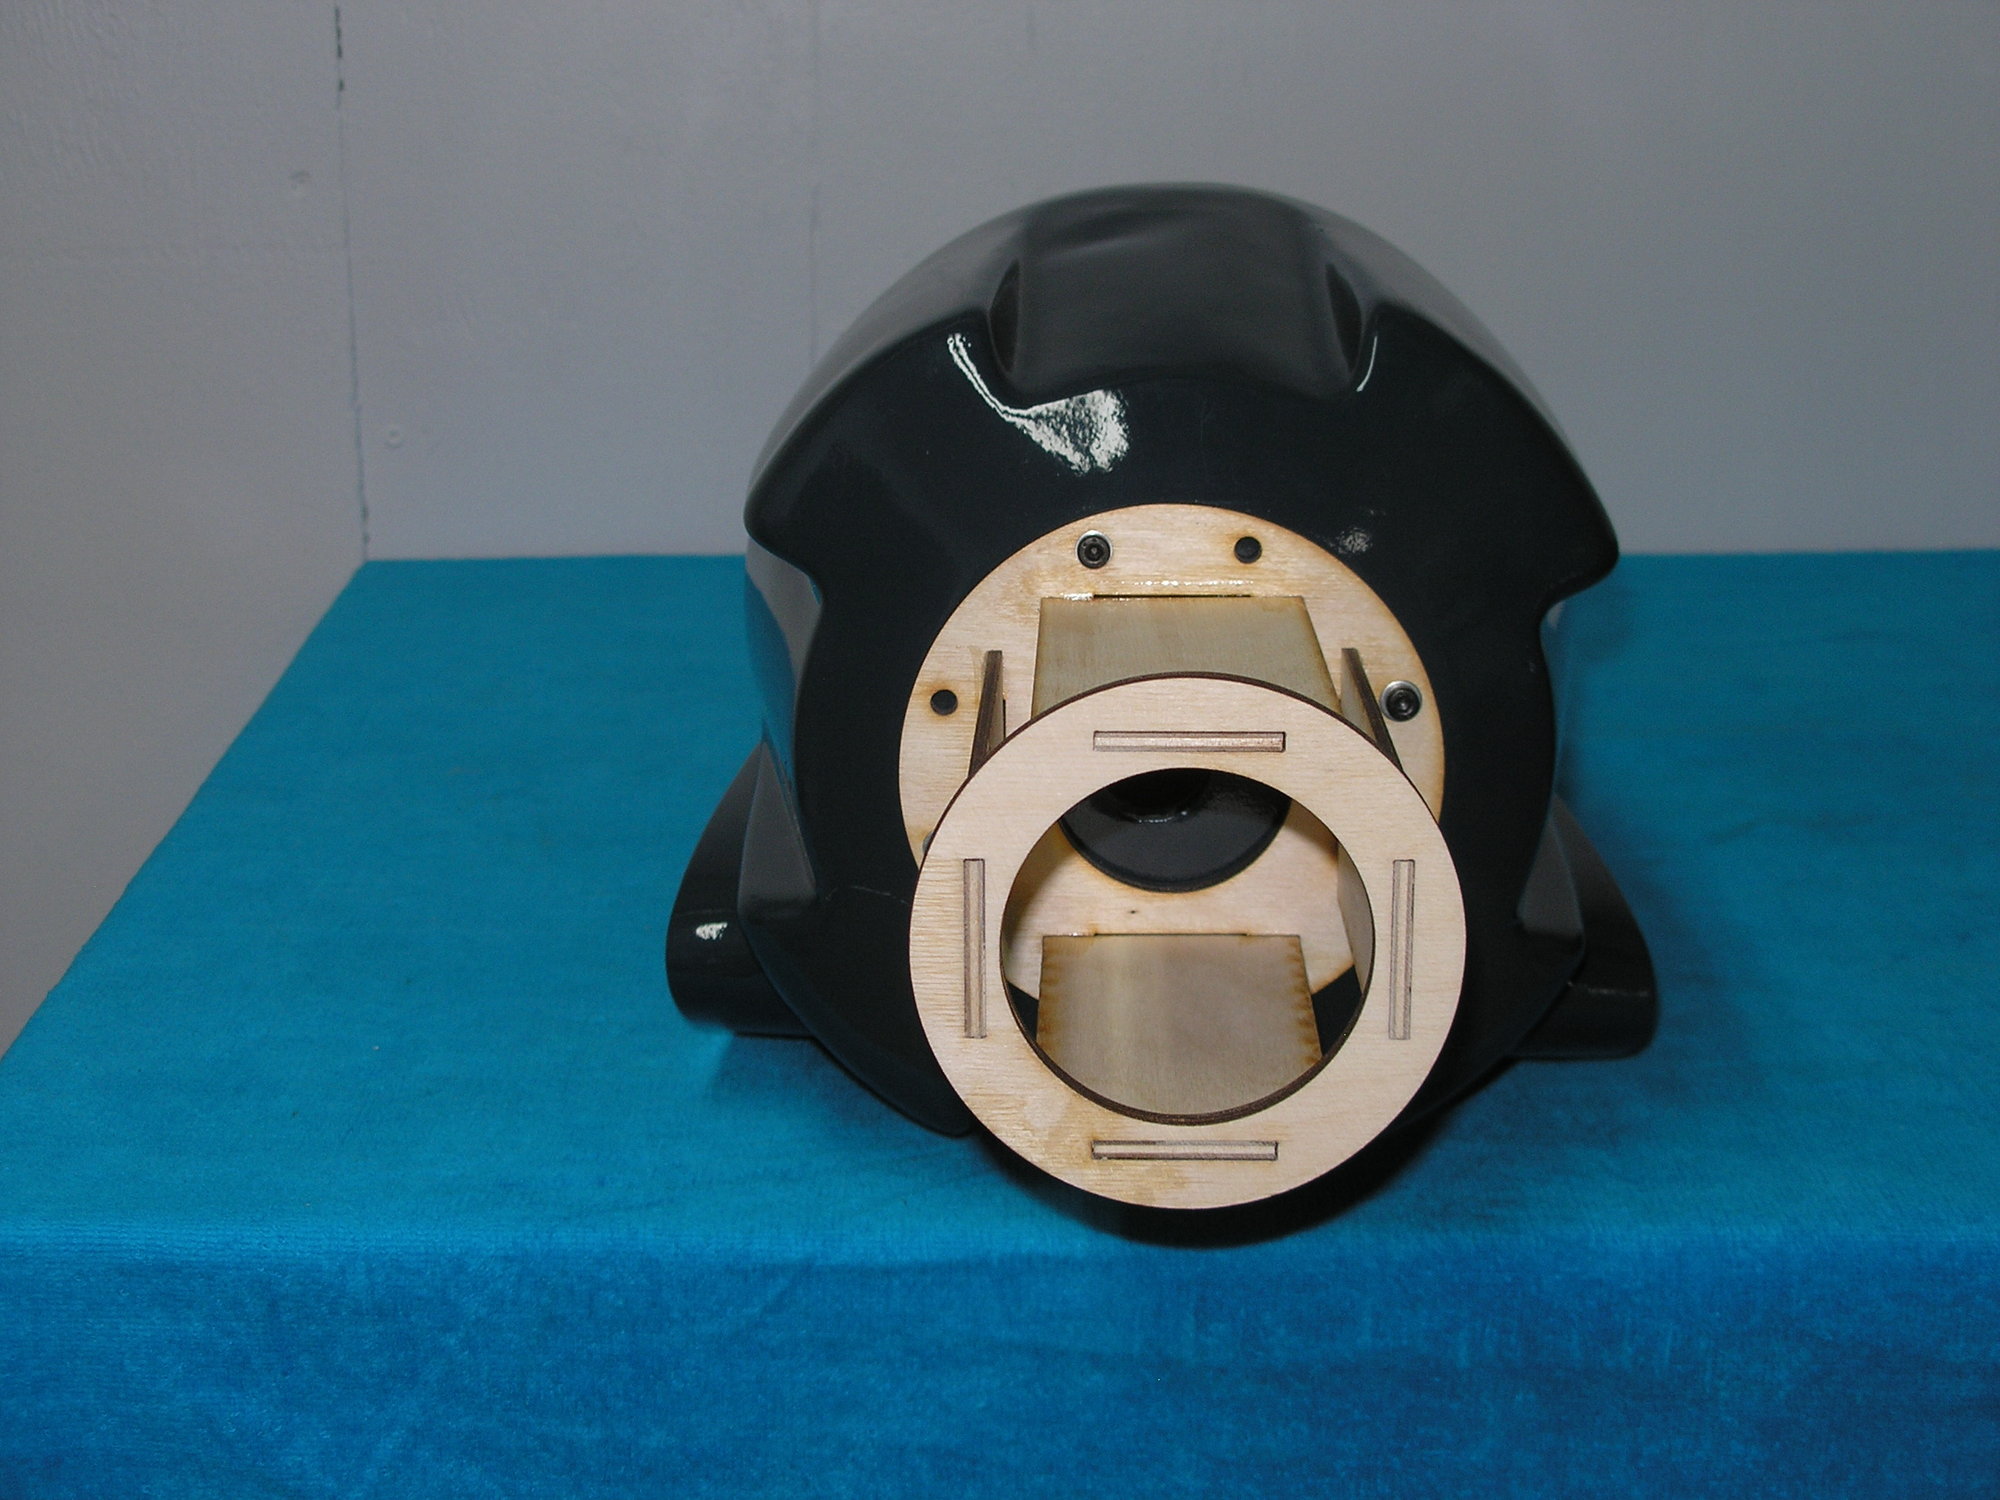
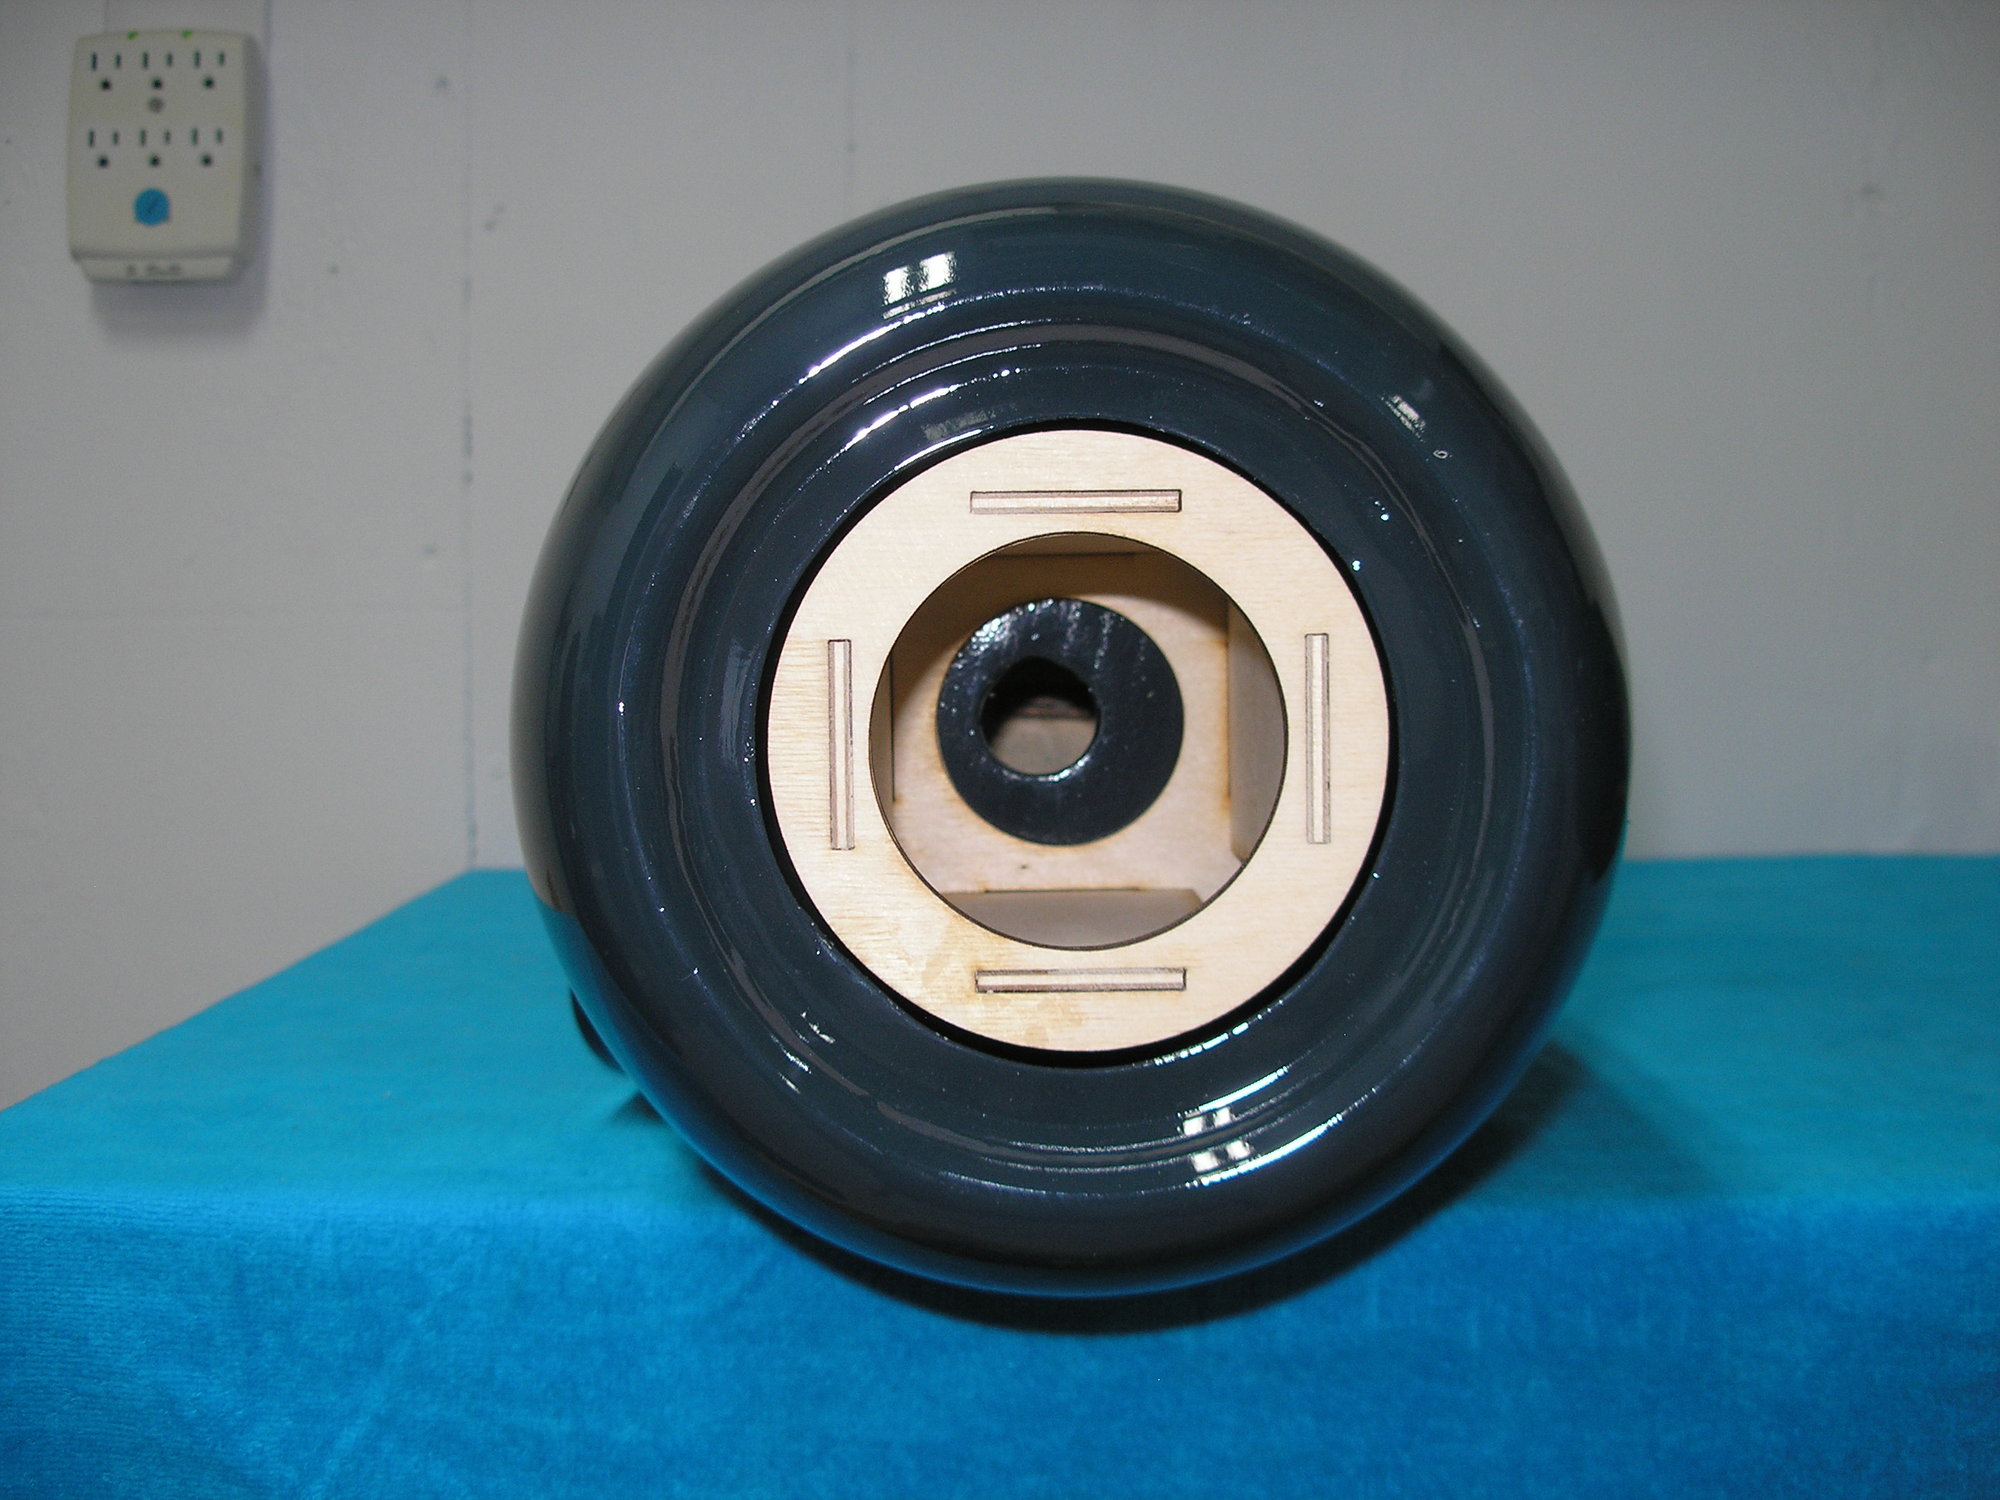
I decided to start on the engine pods. Having access to a laser cutter is a godsend so i designed and cut motor mounts to fit. I took the advice and ordered the Sierra landing gear but when i tried to fit them, discovered that the engine pods were not exactly equal. I had designed and laser cut shims after discovering that the Sierra gear was not a plug and play fit. One pod took almost 1" of shims and the other took much less to keep the wheels from touching the bottom of the pod. I decided to wait until the wing was completed to attack that issue. That way i could shim accordingly to make the wing level at rest.
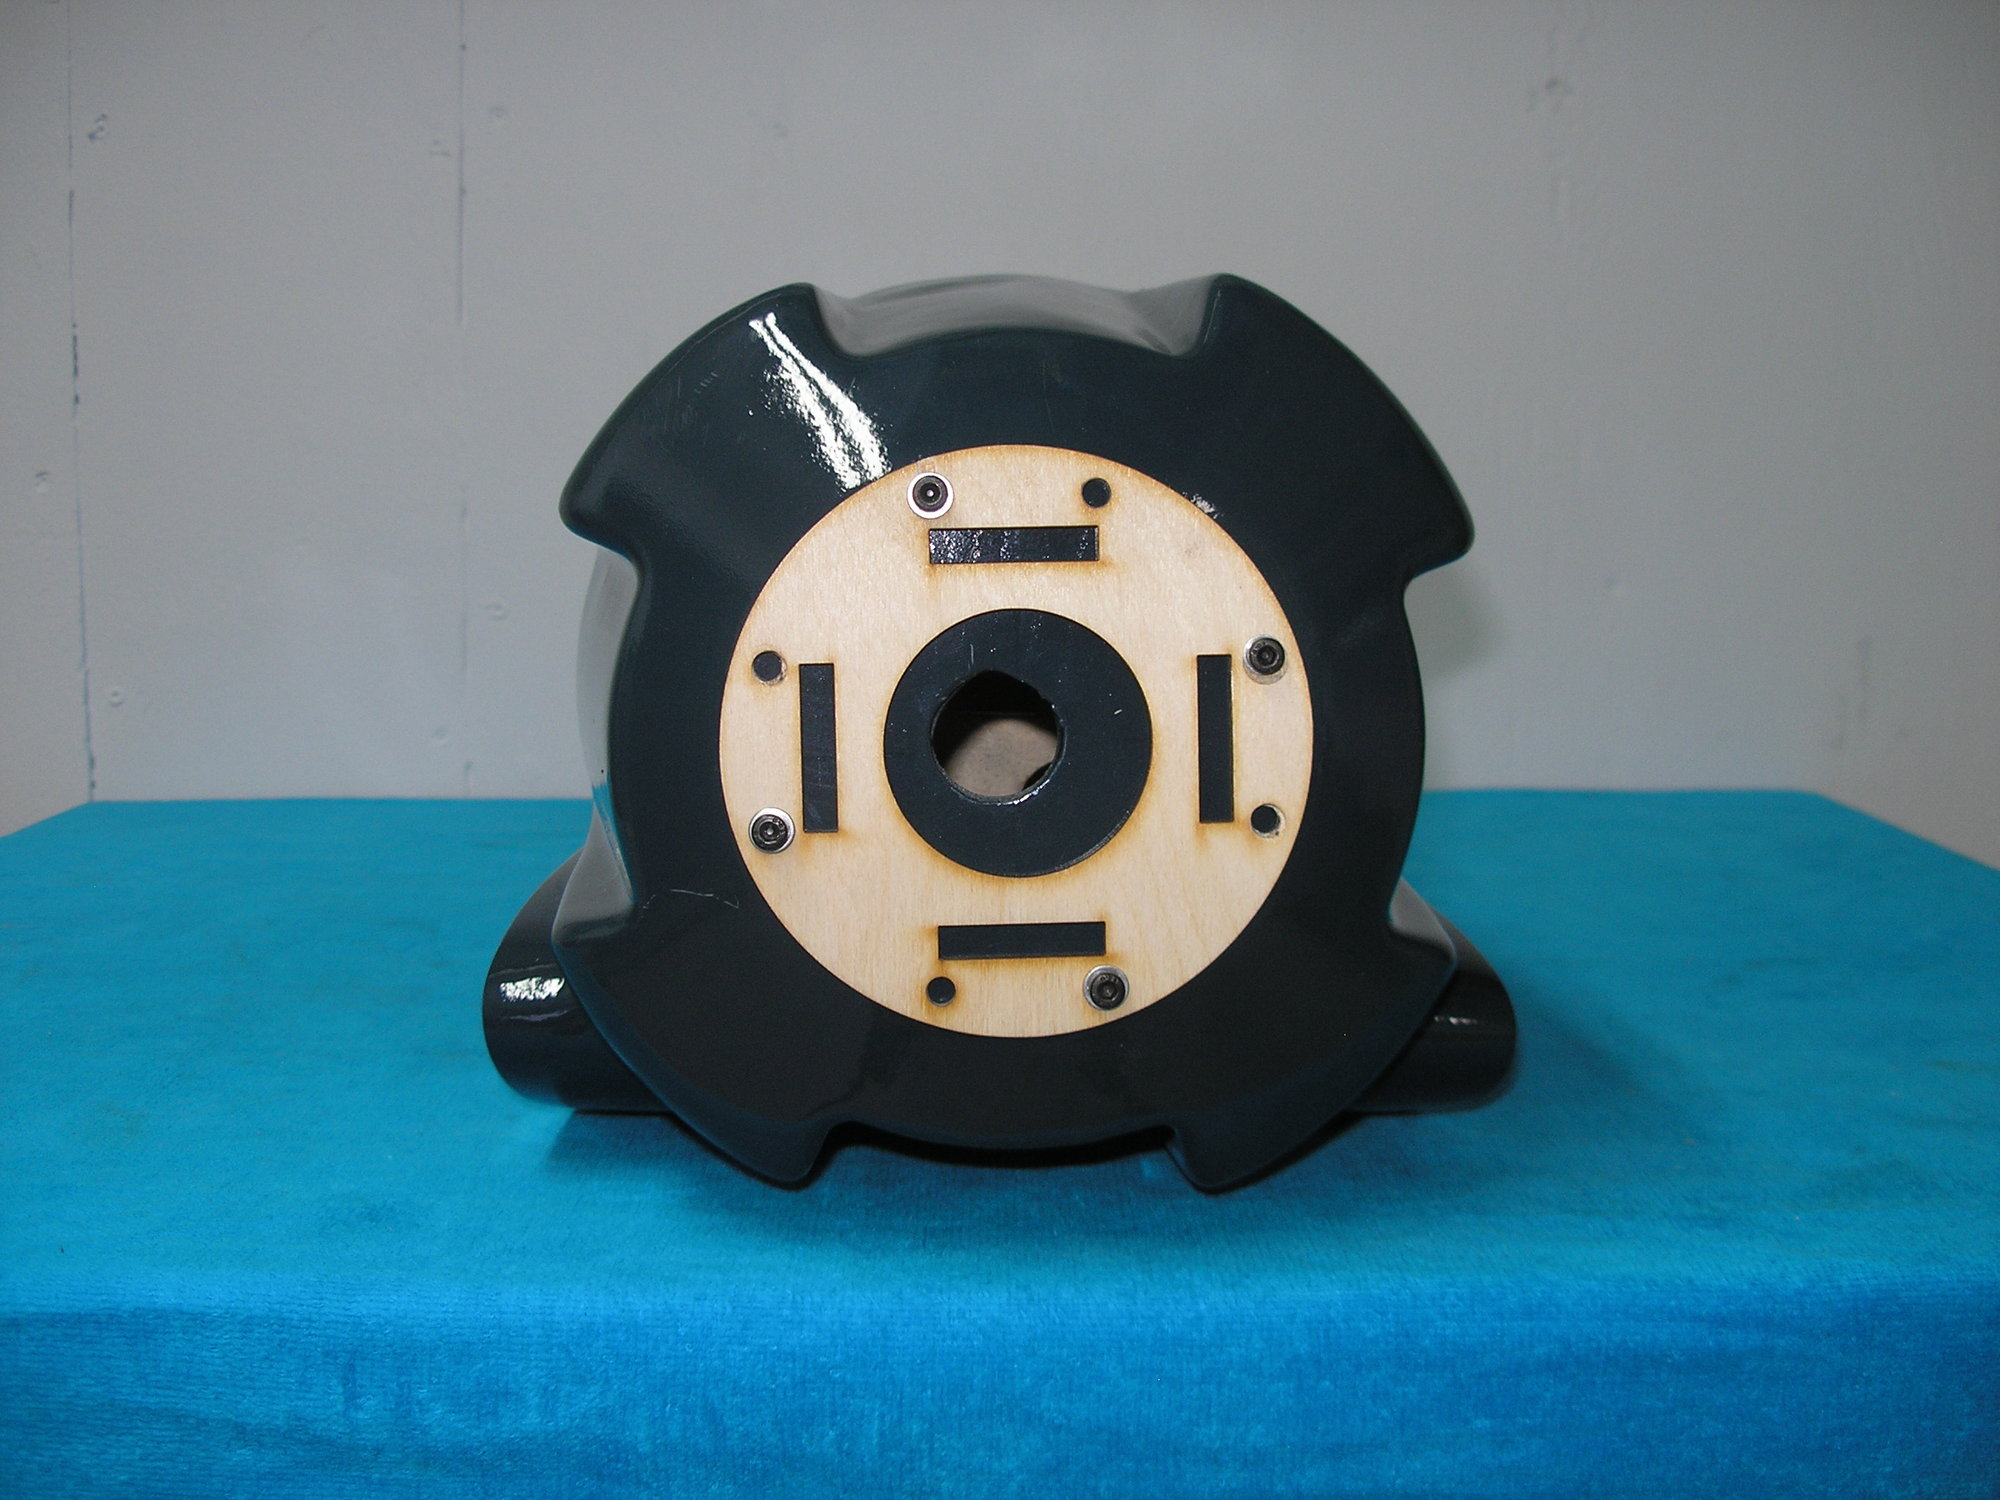
Pattern to align the motor mounts to the pods.
Pattern to align the motor mounts to the pods.
07-01-2018, 01:06 PM
#47
Thread Starter
Next, i worked on the wing assembly. One thing i discovered is that if you intend to build this bird by using the included manual, good luck. In my opinion, it will take a bit of prior building experience to complete this project. The instructions are at best a source of limited technical information such as CG and a few other specifications that were helpful.
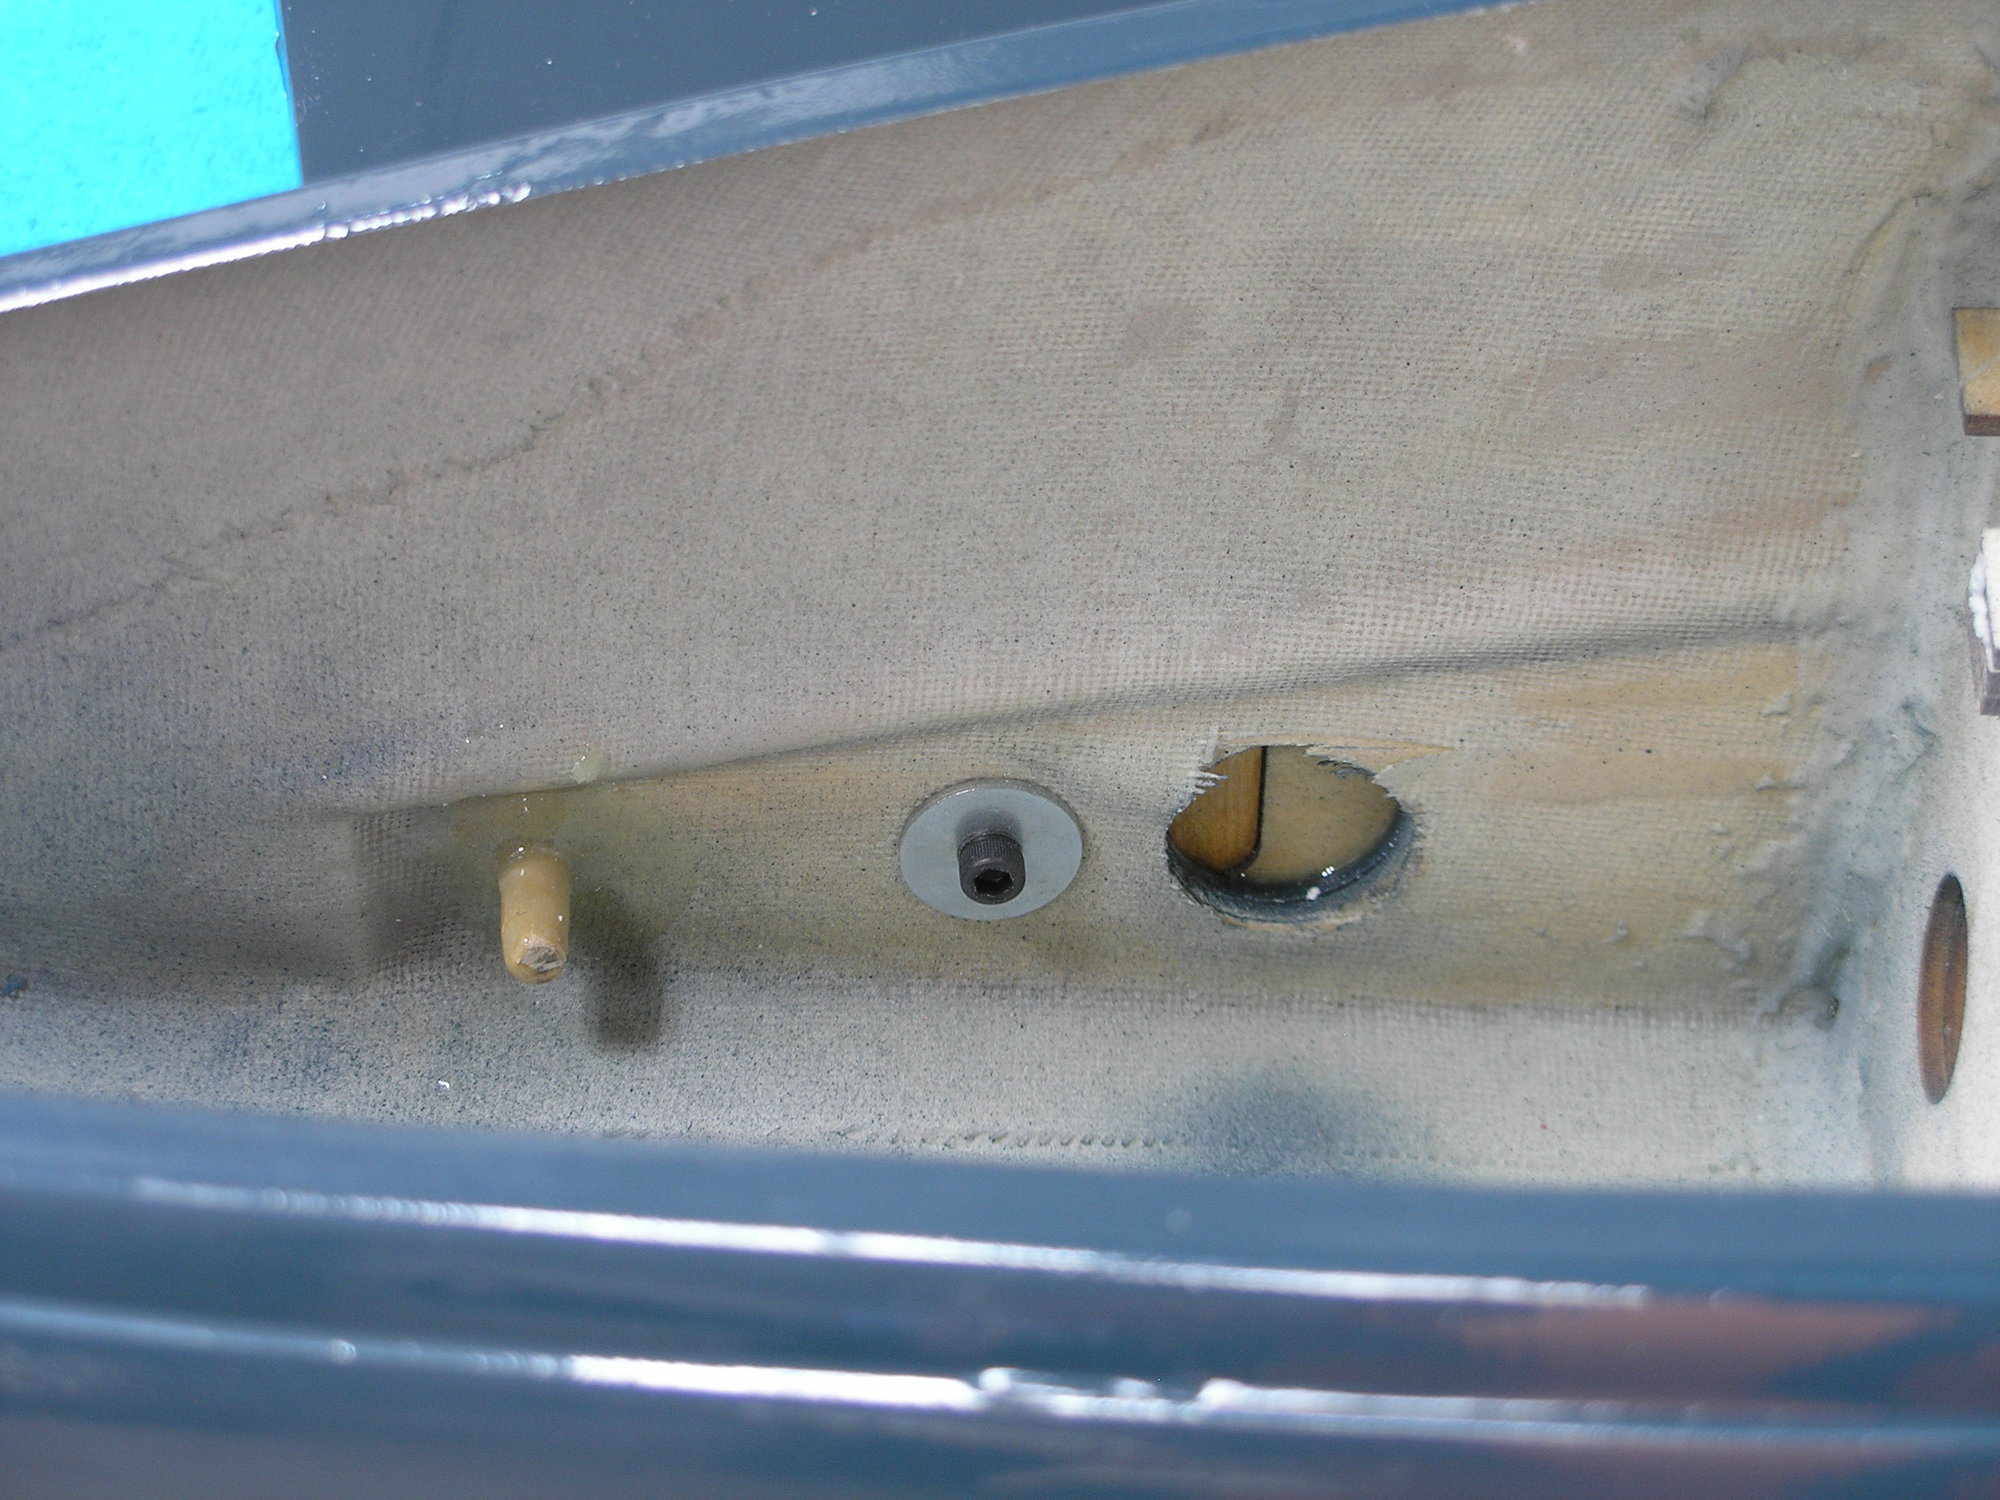
I have been accused of over-engineering and rightly so. The manual shows a process of gluing the wing assembly together. I just couldn't leave it alone and had to create a mechanical bond to hold at least the engine pods to the center wing section. The pictures should tell the story. I added two mechanical attachment points using blind nuts and 8-32 Allen screws with fender washers that pulled the pods and wing center section together tightly. I am happy with that.
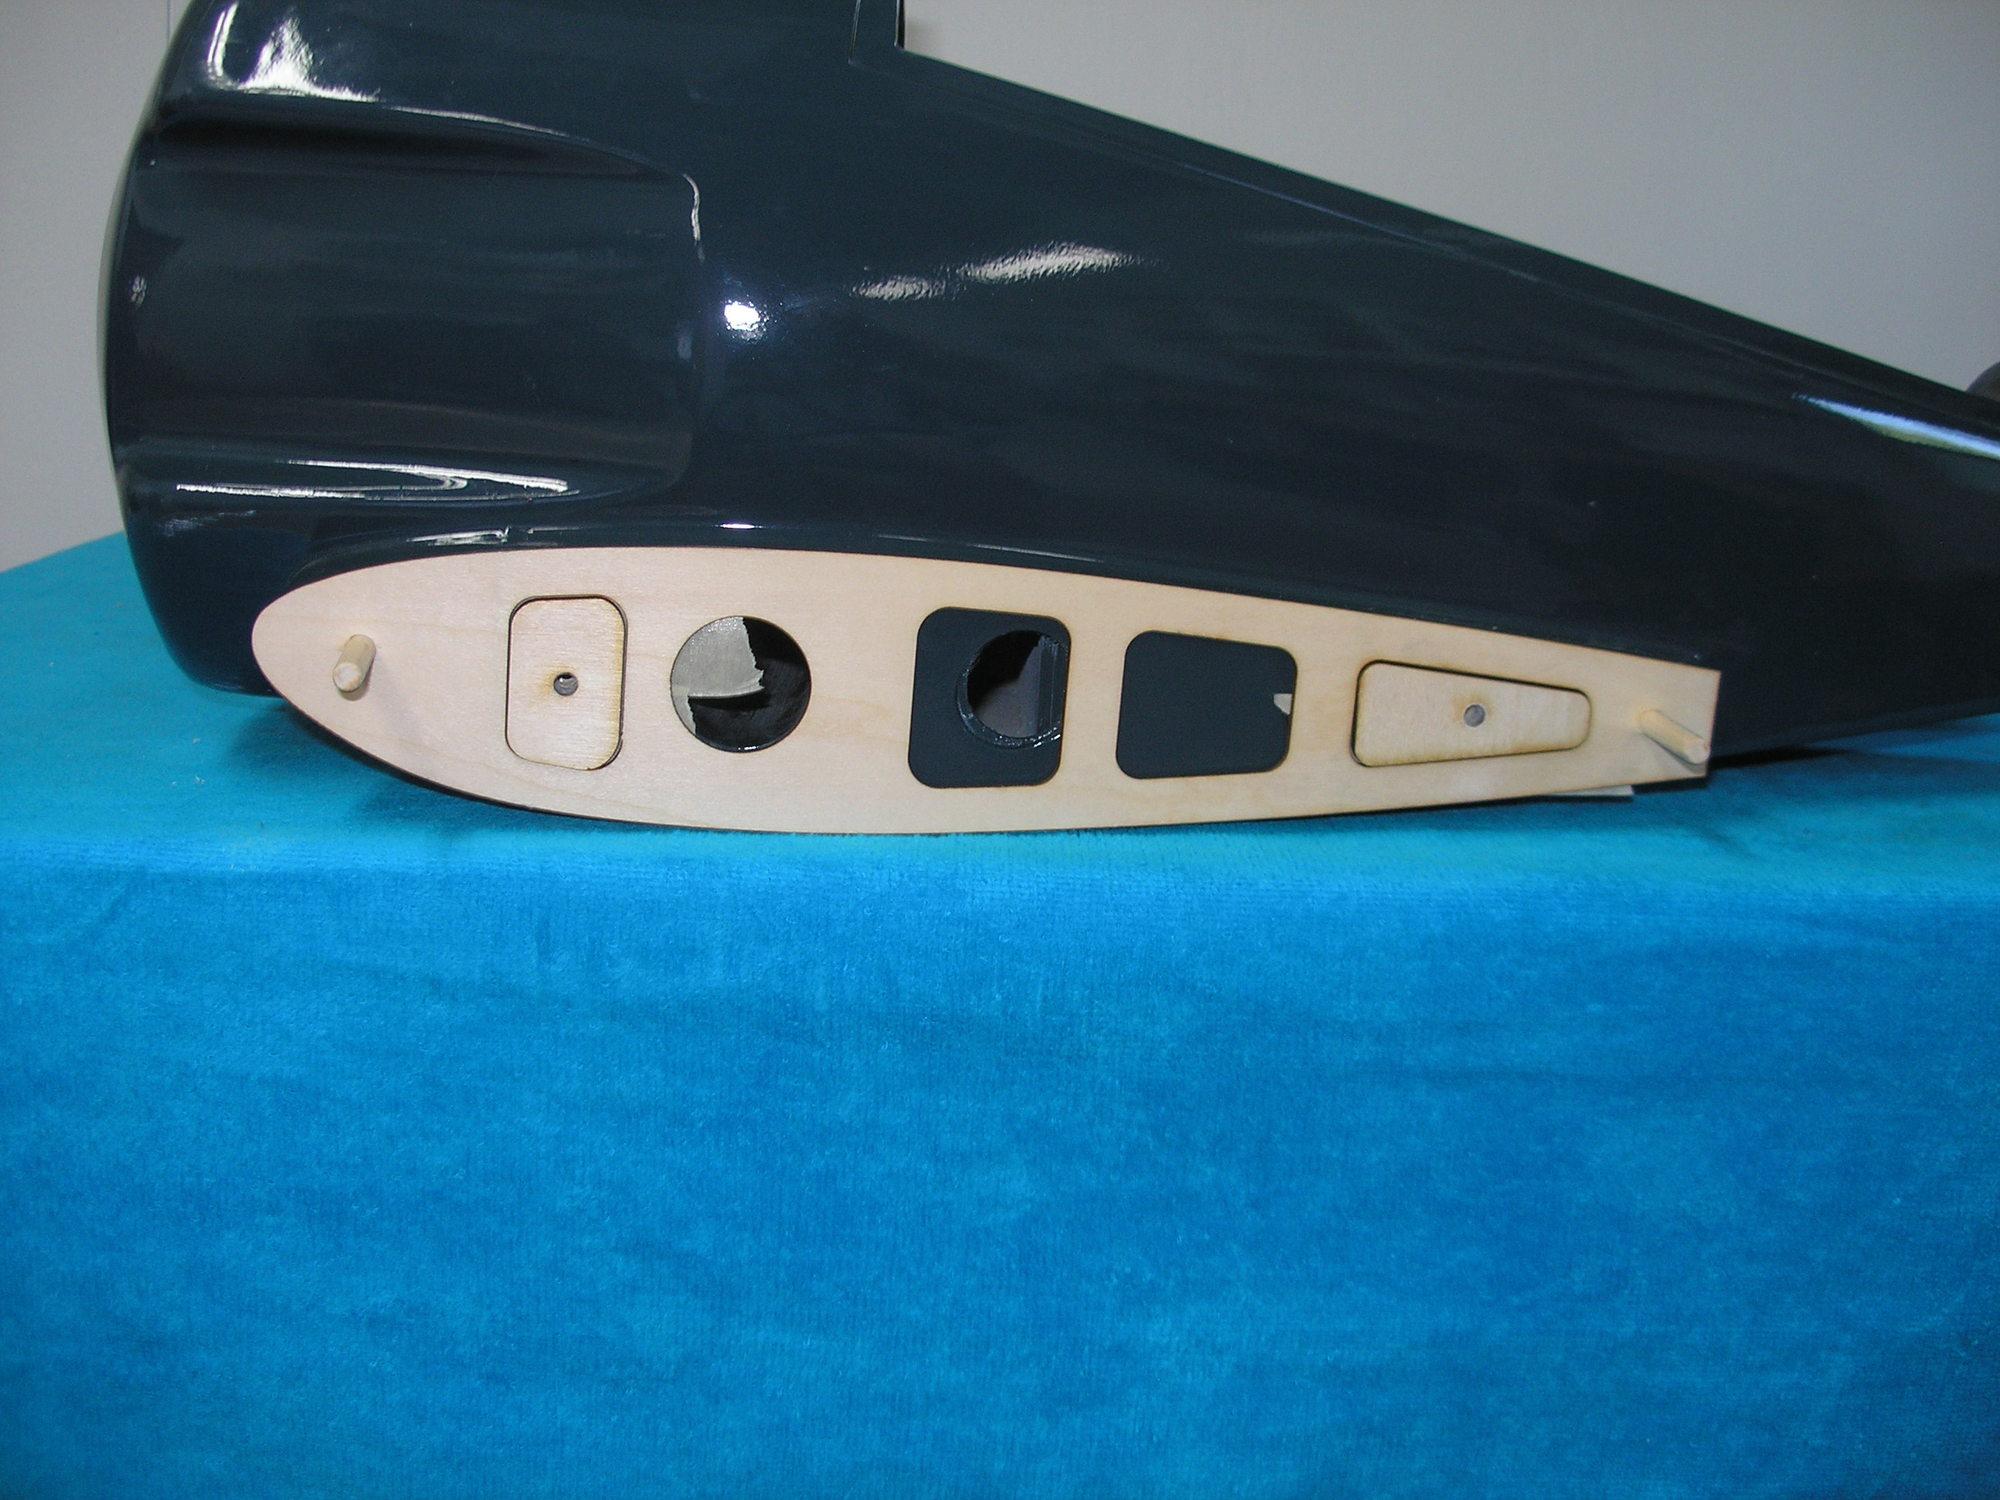
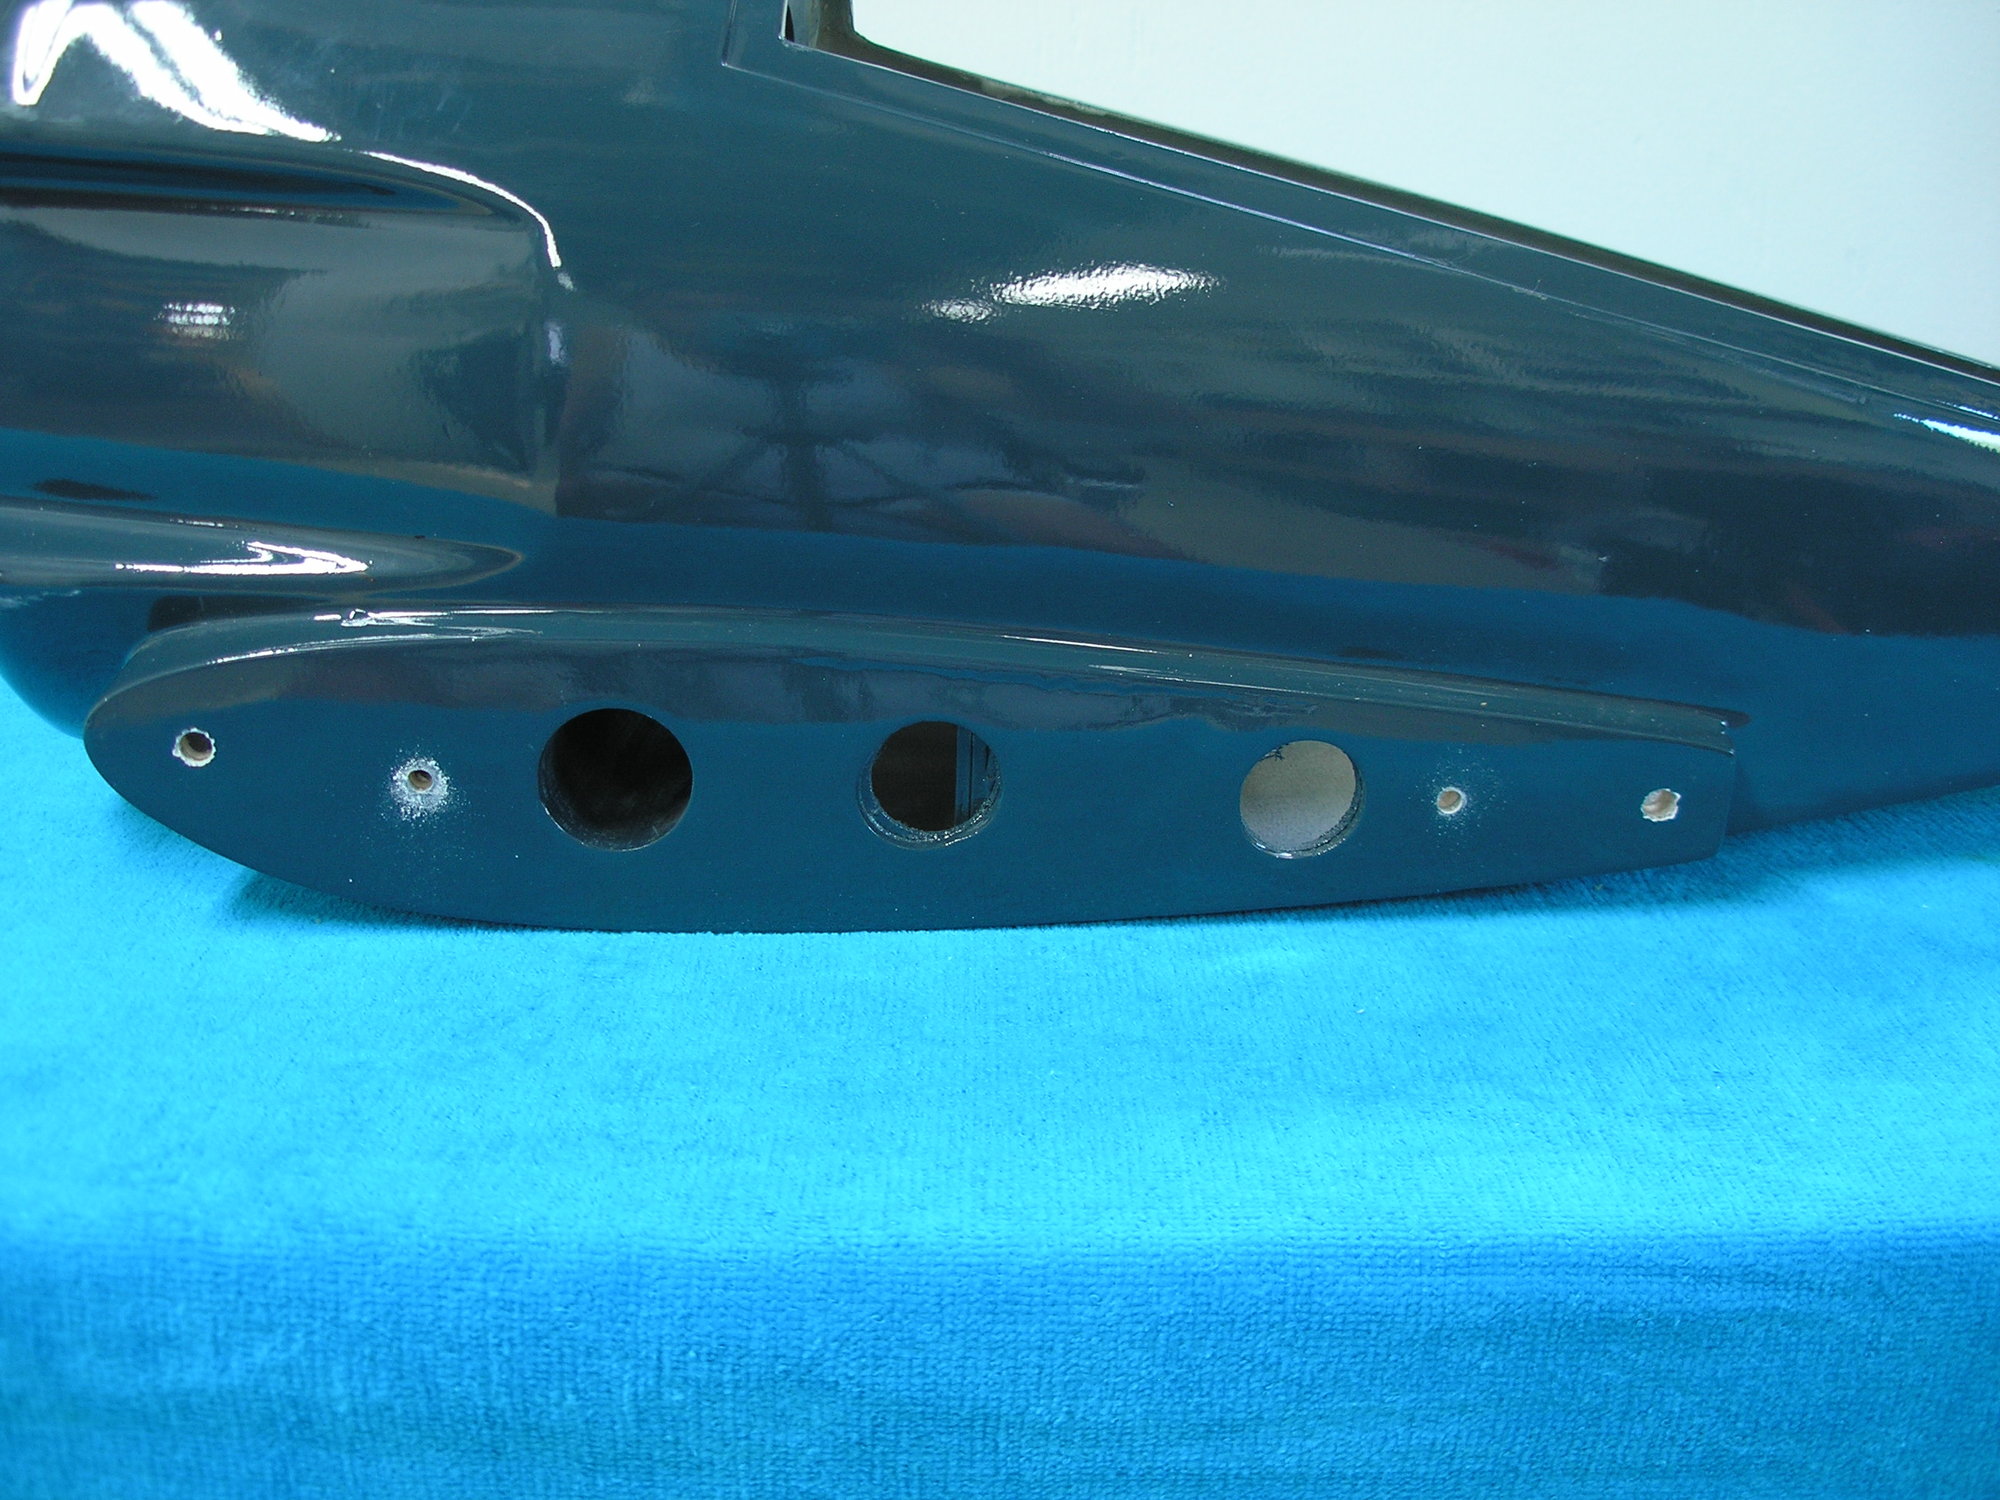
I have been accused of over-engineering and rightly so. The manual shows a process of gluing the wing assembly together. I just couldn't leave it alone and had to create a mechanical bond to hold at least the engine pods to the center wing section. The pictures should tell the story. I added two mechanical attachment points using blind nuts and 8-32 Allen screws with fender washers that pulled the pods and wing center section together tightly. I am happy with that.
 07-06-2018, 02:02 AM
#50
Thread Starter
I liked Uncle Joe's idea of keeping the wing assembled to the fuselage and removing the wingtips for transport so i took his advice and permanently attached the engine pods to the center section with epoxy and 8/32 bolts as i described above. I also decided that i wanted to attach the wingtips in the same manner except without the epoxy. The only issue was getting my hands in place to bolt on the tips at the field. Instead of recruiting a five year old with small hands to go to the field with me and screw in the bolts every time i wanted to fly it, i decided that the only purpose of the forward bulkhead was to mount the fuel tanks for gas/nitro engines so i removed them. The epoxy holding them in place didn't have much of a hold on the fiberglass wall so they pulled out quite easily. Now i can get my hand in there and screw the wingtips on at the field.